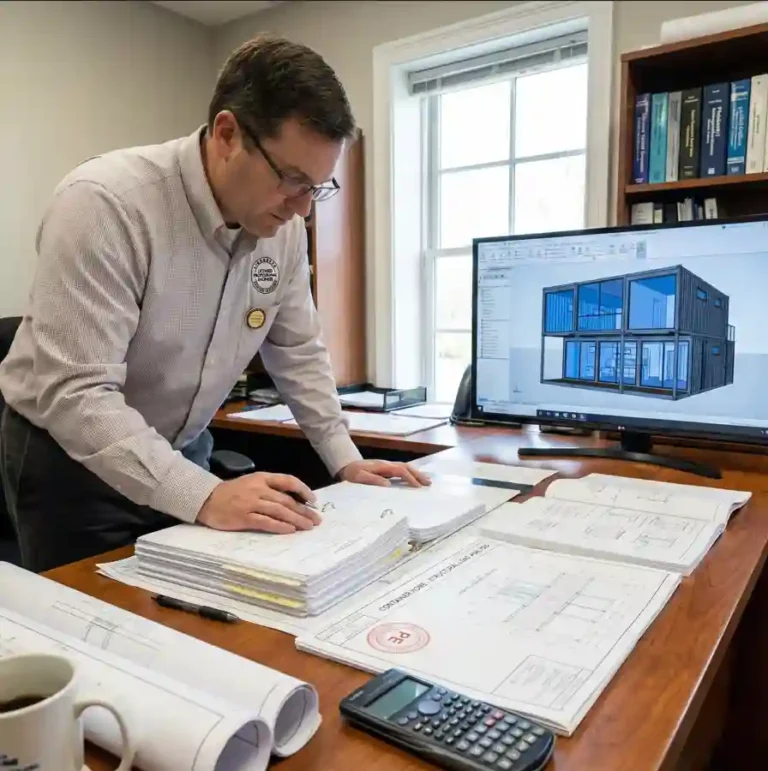
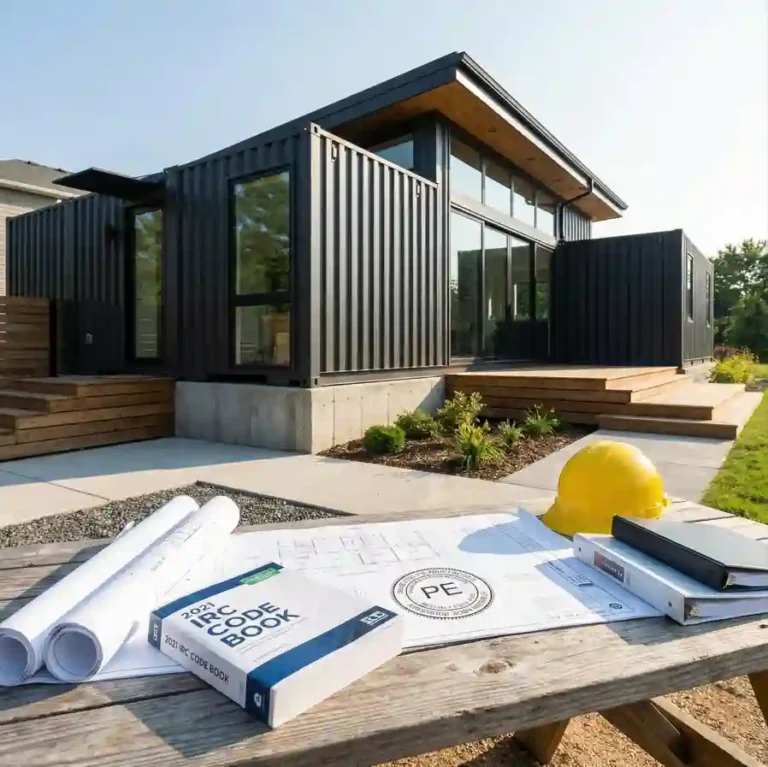
Container Home Site Preparation: The Ultimate 5-Step Guide for a Smooth Foundation Install
Don’t let a muddy site derail your delivery. Master the art of excavation, grading, and logistics to ensure your container home lands on solid ground. A comprehensive 4,500+ word deep dive into code-compliant site work.
You have your permits, you’ve purchased your plans, and your shipping containers are ready to be modified. But if a 40-foot flatbed truck pulls up to your property and sinks into soft mud, or if your crane cannot stabilize its outriggers because the ground isn’t compacted, your project comes to a grinding, expensive halt. Container home site preparation is the unsung hero of the construction process. It is the bridge between a raw piece of land and a code-compliant, structural masterpiece.
Unlike traditional stick-built homes, where materials arrive in small bundles, container homes require heavy logistics from Day 1. This guide goes far beyond simple “dirt work.” We will dive deep into the International Residential Code (IRC) and International Building Code (IBC) requirements for grading and drainage, the geotechnical realities of soil bearing capacity, and the unique logistical demands of maneuvering 8,000-pound steel boxes. Whether you are building on a flat suburban lot or a rugged hillside, this guide ensures your site is ready for the foundation—and the heavy machinery required to build it.
Proper site preparation is not just about moving dirt; it is about managing risk. It involves understanding the legal definitions of “grade,” “fill,” and “compaction” as defined in the codes that govern your build. It requires a strategic approach to water management, ensuring that the millions of gallons of rain that might fall on your property over its lifetime are directed away from your steel investment. In this comprehensive guide, we will walk you through every phase, citing specific code sections so you can communicate confidently with your excavators and inspectors.
Phase 1: The “Paper” Prep – Soil Tests & Site Plans
Before a single shovel hits the dirt, successful container home site preparation begins with data. You cannot build a stable home on unstable ground, and guessing is not an option when dealing with building inspectors and structural engineers. This phase is about gathering the intelligence required to design a foundation that will not fail.
The Geotechnical Report (Soil Test)
While not always mandatory for small sheds, a geotechnical report is almost universally required for permanent dwellings, especially containers which exert high point loads at the corners. This report tells you the “bearing capacity” of your soil—essentially, how much weight the soil can support before it sinks.
The 2021 International Residential Code (IRC) states in Section R401.4 that where quantifiable data indicates expansive, compressible, shifting, or other questionable soil characteristics are likely to be present, the building official shall determine whether to require a soil test to determine the soil’s characteristics at a particular location. This test must be done by an approved agency using an approved method.
Why is this critical for containers? A shipping container is a rigid steel box. If one corner settles 2 inches due to soft soil while the other three remain firm, the container will rack. This can cause doors to jam, windows to crack, and seals to fail. A soil test will reveal:
- Bearing Capacity: Measured in pounds per square foot (psf). If you do not perform a soil test, the code forces you to assume the worst-case scenario. According to IRC Table R401.4.1, clay, sandy clay, silty clay, and clayey silt are assumed to have a load-bearing pressure of only 1,500 psf. However, if you test the soil, you might find you have “Sandy gravel” which has a presumptive load-bearing pressure of 3,000 psf. This doubling of capacity could allow you to reduce the size of your concrete footings by half, saving thousands of dollars in concrete.
- Expansive Soils: The 2021 International Building Code (IBC) defines expansive soils in Section 1803.5.3. These are soils that swell when wet and shrink when dry. If your site has soils with a Plasticity Index (PI) of 15 or greater, or an Expansion Index greater than 20, you cannot simply pour a slab. You may need deep foundations or soil stabilization. Building on expansive soil without knowing it is the primary cause of foundation failure.
- Water Table Depth: IBC Section 1803.5.4 requires investigation to determine if the groundwater table is above or within 5 feet of the lowest floor level. High water tables require expensive waterproofing and drainage systems (see Phase 3).
- Frost Line Depth: This dictates how deep your footings must go to prevent frost heave. IRC R301.2 requires the jurisdiction to establish the frost line depth. You must dig below this line.
The Site Plan and Topography
Your site plan is the map for your excavation crew. It acts as the “construction documents” defined in IBC Section 107, which must be dimensioned and drawn on suitable material. It must show:
- Proposed Footprint: The exact location of the containers.
- Setbacks: Distances to property lines. This is often governed by the “Fire Separation Distance” defined in IRC R202. The distance is measured at a right angle from the face of the wall to the lot line. This distance determines the fire-resistance rating required for your exterior walls. For example, IRC Table R302.1(1) states that walls less than 5 feet from the lot line generally require a 1-hour fire-resistance rating. Site prep errors that place the home 4 feet from the line instead of 5 feet can force you to add expensive fire-rated drywall to the exterior.
- Easements: Utility lines or access paths you cannot build over.
- Topography (Contour Lines): These lines show the slope of the land. Closely spaced lines indicate steep slopes. IRC R403.1.7 dictates specific setbacks for footings on or adjacent to slopes. For example, buildings below slopes must have a clearance (setback) from the toe of the slope to provide protection from drainage and erosion.
Phase 2: Clearing, Grubbing, and Access Roads
Container homes differ from traditional builds in one major way: delivery logistics. A lumber truck can drop a load at the curb. A container delivery truck needs to back up exactly to your foundation, often on a tilt-bed trailer that requires 60-100 feet of straight-line clearance.
Clearing and Grubbing
“Clearing” involves cutting down trees and brush. “Grubbing” involves removing the roots and stumps. This is critical because burying organic material (roots, logs) is a violation of code for slab prep.
- Vegetation Removal: All trees, shrubs, and vegetation must be removed from the building footprint and the driveway path. IRC R504.2 explicitly states for wood floors on ground that “the area within the foundation walls shall have all vegetation, topsoil and foreign material removed”. This principle applies to all foundations.
- Topsoil Stripping: The top 4-6 inches of soil usually contains organic matter. This “topsoil” should be scraped off and stockpiled elsewhere on site for use in landscaping later. It should never be used as structural fill under your foundation. Organic material compresses and decays, leading to voids. IBC Section 1804.2 requires that “the ground immediately adjacent to the foundation shall be excavated to a depth of not less than 12 inches” in some contexts, but generally, all organic topsoil must be stripped.
The Heavy Equipment Access Road
Your driveway isn’t just for your sedan; it must support a truck carrying a 10,000+ pound container. If your site preparation doesn’t include a stabilized access road, you risk the delivery driver refusing to drop the box, or worse, getting stuck. IBC Section 3310.1 requires that “safe and consistent means of egress” be maintained during construction. For a container build, this access road is your lifeline.
Width: Minimum 12 feet (14-16 feet preferred for turns).
Overhead Clearance: 14 feet minimum (watch for power lines and tree branches).
Surface: Compacted gravel (crusher run) is ideal. Mud is the enemy. Code often requires stabilization to prevent erosion (IRC R401.3).
Turn Radius: 40-foot containers on trailers need massive swinging room. Avoid sharp turns.
Phase 3: Excavation & Code-Compliant Grading
This is the heavy lifting phase. You are carving out the space for your foundation and ensuring that water flows away from your home, not into it. Excavations must be performed safely; IBC Section 3304.1 mandates that all excavations be protected to prevent injury to the public and damage to adjoining property.
Cut and Fill
On sloped lots, you will perform a “cut and fill” operation. You cut into the hillside to create a flat spot (the bench). The soil you remove is often used to “fill” the lower side to level it out.
- The Danger of Fill Dirt: You generally should not place a foundation footing on “fill” dirt unless it has been engineered and compacted in lifts (layers) and tested. Undisturbed soil is always stronger. IRC R401.2 requires that “fill soils that support footings and foundations shall be designed, installed and tested in accordance with accepted engineering practice”. This means you cannot just dump dirt and build on it.
- Compaction: If you are adding dirt to level a site, it must be compacted. IBC Section 1804.6 (referenced in inspection contexts) typically requires fill to be compacted to 90% of its maximum dry density. This is usually done in 6-inch to 8-inch layers (lifts) using a vibrating plate compactor or a sheepsfoot roller.
- Controlled Low-Strength Material (CLSM): If you need to backfill a trench or a large void quickly without waiting for compaction tests, IBC 1803.5.9 discusses the use of CLSM, a flowable fill mixture of cement and sand that self-compacts. This is an excellent option for container sites where time is money.
Grading and Drainage (IRC R401.3)
Water management is the most important aspect of site preparation. The International Residential Code has very specific requirements to keep basements and crawl spaces dry. If you fail to grade properly, you invite hydrostatic pressure against your container walls (if buried) or erosion around your piers.
According to IRC Section R401.3 (Drainage): “Surface drainage shall be diverted to a storm sewer conveyance or other approved point of collection that does not create a hazard. Lots shall be graded to drain surface water away from foundation walls. The grade shall fall not fewer than 6 inches (152 mm) within the first 10 feet (3048 mm)“.
| Condition | Code Requirement (IRC R401.3) | Why It Matters |
|---|---|---|
| Standard Lot | 6-inch drop over first 10 feet | Uses gravity to move rainwater rapidly away from the steel container walls to prevent corrosion and foundation undermining. |
| Tight Lot Lines | Drains or swales required | If you don’t have 10 feet of space, you must engineer a swale (a shallow ditch) to capture and redirect water. The code allows exceptions where physical barriers prohibit the 6-inch fall. |
| Impervious Surfaces | 2% slope minimum | If concrete/asphalt touches the foundation, it must slope away at a 2% grade (approx. 1/4 inch per foot). |
IBC Section 1804.4 also reinforces this, stating that site grading shall ensure that surface water flows away from the foundation walls. Proper grading protects your foundation options from hydrostatic pressure, which can crack concrete and flood basements.
Phase 4: Utility Rough-Ins & Trenching
Before you pour concrete or set piers, you must install the “veins” of your home—the utility lines. Doing this after the foundation is poured is difficult, expensive, and sometimes impossible.
The “Under-Slab” Utilities
If you are building a slab-on-grade foundation (common for containers), all your plumbing drains and electrical conduits entering the home from below must be placed before the concrete arrives.
- Sanitary Sewer/Septic: The main waste line must be sloped to ensure flow. IRC P2604 covers trenching and backfilling. It states that trenching must be done so that the pipe has a continuous bearing on the trench bottom. If you over-excavate (dig too deep), you must backfill with tamped earth or sand to provide support. Rock should never touch the pipe.
- Backfilling: IRC P2604.3 requires backfill to be free from rocks, broken concrete, and frozen chunks. It must be placed in 6-inch layers and tamped.
- Protection: IRC P2603.3 states that pipes passing through or under walls shall be protected from breakage. You may need to sleeve the pipe where it passes through the foundation beam.
- Water Supply: The main water line usually needs to be buried below the frost line to prevent freezing. IRC P2603.5 requires water, soil, or waste pipes liable to freezing to be protected. The specific depth is usually determined by the local jurisdiction (often inserted into the code text).
- Electrical Service: If you have underground power, the conduit must be laid. IRC Table E3803.1 dictates the burial depth. For example, direct buried cable generally requires 24 inches of cover, while rigid metal conduit might only require 6 inches. Note: Always use “sweeps” (long radius bends) for your conduit to make pulling the heavy main feeder wires easier later.
💡 Pro Tip: The “Sleeve” Method
Even if you aren’t sure exactly where every wire will go, lay a 4-inch PVC “sleeve” pipe under your driveway or foundation during site prep. This gives you a hollow tunnel to run future wires or pipes through without having to tear up your concrete later. Ensure the ends are taped shut to keep out dirt and concrete during the pour.
Phase 5: The Pad & Foundation Prep
Now that the site is cleared, graded, and utilities are roughed in, you prepare the specific footprint for the foundation. This is where precision matters most.
Slab-on-Grade Prep (IRC R506)
For a monolithic slab, site prep is rigorous. Reference IRC Section R506 for Concrete Floors (On Ground).
- Base Course: IRC R506.2.2 requires a 4-inch thick base course consisting of clean graded sand, gravel, crushed stone, or crushed concrete passing a 2-inch sieve. This acts as a capillary break, stopping moisture from wicking up into the slab.
- Exception: If the native soil is well-draining sand (Group I soils), the base course may be omitted, but for container homes, we highly recommend it for stability.
- Vapor Retarder: IRC R506.2.3 mandates a 6-mil (0.006 inch) polyethylene vapor retarder (or approved equivalent) with joints lapped not less than 6 inches. This must be placed between the base course and the concrete. This is non-negotiable for container homes to prevent condensation on the interior floors. Container floors are often plywood; moisture rising from the slab can rot them out from below.
- Reinforcement: While the IRC doesn’t strictly require rebar in all non-structural slabs, IBC 1907 sets minimums for structural plain concrete. For a container home foundation, you are supporting heavy point loads. You will likely need a grid of rebar (e.g., #4 bars at 16″ on center) or welded wire mesh to control cracking and add tensile strength.
Footing Prep (IRC R403)
If you are using a stem wall or pier system, you will dig footings. IRC R403.1 states that all exterior walls shall be supported on continuous solid or fully grouted masonry or concrete footings.
- Depth: IRC R403.1.4 requires exterior footings to be placed not less than 12 inches below the undisturbed ground surface. Crucially, they must also extend below the frost line (IRC R403.1.4.1). If you build on frozen soil, the heat from the house can thaw it, causing sinking.
- Width: The width of the footing is based on the load-bearing value of the soil (Phase 1). IRC Table R403.1(1) provides minimum widths. For example, a 2-story conventional home on 1,500 psf soil might need a 15-inch wide footing. Containers have different load distributions, so consult your structural engineer, but the site prep involves digging these trenches cleanly and squarely.
Dampproofing vs. Waterproofing (IRC R406)
If you have a basement or a stem wall retaining earth, you must protect it from moisture. IRC R406.1 requires dampproofing for concrete and masonry foundations enclosing habitable spaces below grade.
- Dampproofing: A bituminous coating applied to the outside of the wall. Required where hydrostatic pressure is not an issue.
- Waterproofing: Required by IRC R406.2 in areas where a high water table or other severe soil-water conditions are known to exist. This involves more robust membranes (rubberized asphalt, etc.). Site prep includes ensuring the excavation is wide enough to allow workers to apply this coating safely.
The Container Logistics Factor: Cranes & Trucks
This is the phase often overlooked by general excavators who are used to stick-framing. You must prepare the site not just for the house, but for the equipment that delivers the house. This falls under the broad umbrella of “Construction Safeguards” in IBC Chapter 33, ensuring the site is safe for operations.
The Crane Pad
If you are using a crane to lift containers into place (common for hillside builds or multi-story stacks), the crane needs a flat, compacted pad to set its outriggers. A fully loaded crane can weigh 50,000+ pounds.
- Compaction is Key: If the ground under an outrigger settles even a few inches, the crane can tip over. You may need to excavate a specific pad for the crane and backfill it with compacted gravel, similar to the foundation requirements in IBC 1804.
- Swing Radius: Ensure the site prep includes clearing trees and power lines within the crane’s “swing radius.”
Tilt-Bed Delivery Access
If you are delivering via tilt-bed truck (sliding the container off the back), the truck needs a straight approach. The truck + trailer + container is roughly 60-70 feet long. To slide the box off, the truck pulls forward. This means you need 100+ feet of straight, cleared, relatively flat ground in front of the foundation. This “runway” must be cleared and grubbed (Phase 2) just like the building pad.
Site Prep Cost Estimator & Budgeting
Site preparation costs vary wildly based on terrain and location, but here are general ranges for 2025 to help you budget. These estimates assume professional execution.
| Task | Estimated Cost (National Avg) | Variables |
|---|---|---|
| Geotechnical Soil Report | $800 – $2,500 | Depth of borings, lab testing required. |
| Clearing & Grubbing | $1,200 – $4,000 per acre | Density of trees, disposal fees for stumps. |
| Excavation & Grading | $1,500 – $6,000 | Amount of dirt moved, cut/fill requirements, slope severity. |
| Utility Trenching | $5 – $12 per linear foot | Rock, depth, type of utility. |
| Gravel/Base Material | $25 – $50 per ton | Delivery distance from quarry. |
| Total Average | $5,000 – $15,000+ | Sloped lots or rock excavation can easily double this. |
Financial Disclaimer: Costs vary significantly by location, site conditions, and material choices. These are estimates for planning purposes only.
DIY vs. Professional Excavation: A Risk Analysis
Many container home builders are tempted to rent a mini-excavator and do the site prep themselves. While possible, evaluate the risks carefully.
When to DIY
- Flat Land: If your lot is dead level and only needs topsoil stripping.
- Simple Soil: If you have sandy or loamy soil that digs easily (Group I soils per IRC Table R405.1).
- No Heavy Logistics: If you have plenty of room for trucks and don’t need a crane pad.
When to Hire a Pro
- Sloped Sites: Managing cut/fill ratios and preventing erosion requires experience. Incorrect benching of a slope can lead to landslides.
- Drainage Issues: If you get the grade wrong, you will flood your house. Pros use laser levels to guarantee the 6-inch drop required by IRC R401.3.
- Rock or Clay: Digging in rock requires jackhammers; heavy clay requires specific compaction techniques to prevent settling.
- Code Compliance: A pro knows the difference between “clean fill” and “organic fill” and how to compact to 90% density as often required by IBC 1804.
❓ Frequently Asked Questions
Do I need a permit for container home site preparation?
Yes, in most jurisdictions, any “land disturbance” over a certain square footage requires a grading permit. IBC Section 105.1 states that any owner who intends to construct, enlarge, or alter a building must obtain a permit. Additionally, if you are digging utility trenches, you will likely need plumbing and electrical permits. Always check with your local building department before moving dirt. This ensures you don’t violate erosion control or zoning ordinances.
Can I place a shipping container directly on the ground?
Generally, no. While temporary storage containers are often placed on the ground, a permanent residence must have a foundation. Placing a container directly on the soil traps moisture against the steel floor joists, accelerating rust and rot. Furthermore, IRC R403.1.4 requires footings to extend below the frost line to prevent heaving. Always use a proper foundation system.
How much gravel do I need for my container home pad?
For a slab-on-grade, IRC R506.2.2 requires a minimum 4-inch base course of clean graded sand, gravel, or crushed stone. For a gravel pad foundation (often used for sheds or simple structures), a depth of 6-12 inches of compacted crushed stone is recommended to facilitate drainage and provide a stable base. Calculate volume by multiplying length x width x depth, and always order 10-15% extra for compaction.
What is the difference between a “site plan” and a “grading plan”?
A site plan shows the location of the building on the lot (setbacks, footprint). A grading plan shows vertical data—how the land slopes, where the water drains, and the specific elevations of the finished floor relative to the ground. IBC 1804.1 often requires a grading plan to ensure excavation doesn’t damage adjoining property.
Start Your Build on Solid Ground
Site preparation is just the beginning. Ensure your container home sits on a code-compliant, engineer-approved foundation with our detailed plan sets. We understand the nuances of IBC and IRC requirements to keep your project safe and legal.
Explore Foundation PlansIf your site has unique challenges like steep slopes or difficult soil, we offer a professional plan modification service after purchase to help adapt our designs to your land. Just contact us for a quote!
Important: Our plans are permit-ready but require review and stamping by a local licensed Professional Engineer (PE) in your jurisdiction. Final approval is subject to local building codes and regulations. We recommend consulting your local building department to verify all requirements.
Refund Policy: Due to the digital nature of our plans, all sales are final. Please review our Refund Policy for details.