The #1 Container Home Mistake: Underestimating Permit Costs & Timelines
This ultimate guide details the most common container home permit mistakes, from zoning blunders and code violations to hidden fees and inspection failures, helping you create a clear path to approval.
Your Essential Guide to Avoiding Permit Disasters
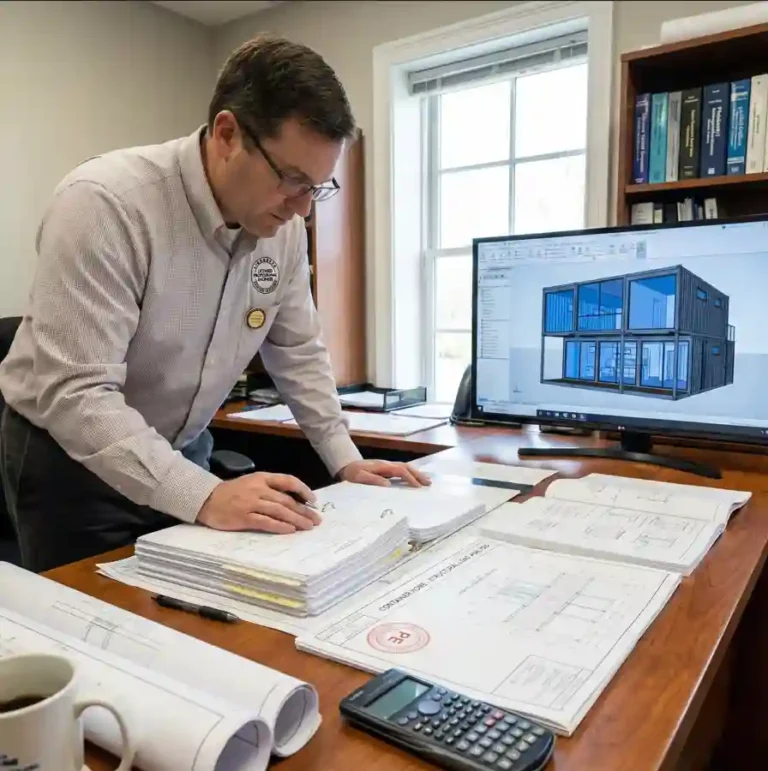
Building a container home is an exciting journey. You’ve seen the stunning designs online, calculated the potential savings, and imagined a life of smart, sustainable living. But between that dream and your move-in day lies a mountain of paperwork, bureaucracy, and technical requirements: The Permitting Process.
At PermitContainerHomes.com, we believe in being transparent and supportive partners. We want you to succeed. And that begins with being honest about the single biggest mistake new builders make: underestimating the complexity, cost, and timeline of the permit process.
This is, without a doubt, the most frustrating part of the build. It’s where enthusiasm meets red tape. Many ambitious DIY projects are stopped cold right here, not by a hammer or a welder, but by a permit denial stamp. Why? Because container homes are “alternative construction.” They don’t fit the standard mold, and your local building department is required to scrutinize them for safety and compliance.
This guide is here to be your professional partner. We will walk you through the most common container home permit mistakes we see every day. From the big “before you buy” blunders to the small but costly code violations, we’ll help you anticipate the hurdles so you can plan for them. Our goal is to demystify this process, help you avoid delays, and set your project on the path to a swift approval.
The Two “Mistakes” You Must Avoid: Cost & Time
Before we dive into the technical code details, we must address the two biggest shocks to a new builder’s budget and schedule. These are the “meta-mistakes” that create the most stress, and they both happen before you’ve even broken ground.
Financial Mistake: Underestimating Total Permit & Compliance Costs
Many builders budget for their permit thinking it’s a single filing fee. In reality, the “permit cost” is a cluster of professional fees, reports, and applications. A $500 permit application fee can easily be attached to $10,000 in required prerequisite work.
A realistic “Permit & Compliance” budget should account for:
- Permit Application Fees: The base fee paid to your building department. This is often based on your project’s total estimated value.
- Plan Review Fees: A separate fee charged by the jurisdiction for the hours their staff spends reviewing your documents.
- Professional Engineer (PE) Fees: This is non-negotiable. You will need a licensed PE in your state to review and “stamp” your structural plans. This is a primary cost of compliance.
- Land Survey: A recent survey (often called a “plot plan” or “site plan”) is almost always required to show property lines, setbacks, and the exact placement of the proposed home.
- Geotechnical Report (Soils Report): Many jurisdictions require this, especially if you are on a slope or in an area with expansive soils. A soil report dictates your foundation design.
- Septic/Percolation Test: If you’re not on a public sewer, you’ll need a “perc test” to prove the land can support a septic system, which comes with its own design and permit fees.
- Utility Connection Fees: Fees charged by the power, water, and sewer authorities to connect your new home to their grid.
- Variance Application Fees: If you fail to meet a zoning rule (e.g., you’re 2 feet into a setback), applying for a variance is a costly and time-consuming legal process with no guarantee of success.
- Inspection & Re-Inspection Fees: Some jurisdictions charge for each inspection, and almost all charge a hefty fee if they have to come back a second time for a failed inspection.
Suddenly, the “cost” of the permit is a major line item. Failing to budget for this is one of the most painful container home permit mistakes.
A Quick Note on Cost Estimates
Financial Disclaimer: Costs vary significantly by location, site conditions, and material choices. These are estimates for planning purposes only. We always recommend getting itemized quotes from local professionals.
Timeline Mistake: Expecting a 2-Week Turnaround
In the world of government services, “express” is not a common word. Your local building department is likely understaffed and overworked. The idea that you can submit plans and get a permit two weeks later is, unfortunately, a fantasy in most parts of the country.
A more realistic timeline looks like this:
- Submission (Week 1): You submit your complete plan package (which may have taken 2-4 weeks to assemble with your PE).
- Triage (Week 1-2): A clerk checks if your package is “complete.” If it’s missing a form, it’s rejected immediately. You fix it and go to the back of the line.
- First Review (Week 3-8): Your plans are assigned to a reviewer (or multiple reviewers for zoning, structural, MEP, etc.). They go through every page.
- Comments Issued (Week 9): You receive a “comment letter” or “correction notice.” This is a list of 5, 10, or 20 things that need to be fixed, clarified, or redesigned. This is normal.
- Revision (Week 10-12): You and your PE must now address every single comment, update the plans, and resubmit.
- Second Review (Week 13-16): You are back in the review queue. A reviewer checks only if you fixed the items on the comment letter.
- Approval (Week 17): If all comments are resolved, you get the call to come pay your fees and pick up your approved permit.
⚠️ A 3-4 month permit timeline is common. A 6-month timeline is not unusual, especially in busy cities. Underestimating this timeline will wreck your budget, your construction schedule, and your relationship with your builder.
The takeaway: The permit process is a marathon, not a sprint. The best way to shorten it is to submit a high-quality, comprehensive, and code-compliant plan set the first time. That’s where we come in.
Zoning Mistake: Buying Land Where You Can’t Build
This is the most tragic mistake, because it’s the hardest to fix. You find the perfect parcel of land, buy it, and then go to the zoning office, only to be told your container home project is not allowed. This is a multi-thousand-dollar error that is 100% avoidable.
Building Codes vs. Zoning: A Critical Distinction
Before you make a single phone call, you must understand this concept. People use “code” and “zoning” interchangeably, but they are two completely different sets of laws.
- Building Codes (like the IRC/IBC): These are technical rules that govern HOW you build. They focus on safety and structural integrity. They answer: “Is it strong? Is it safe from fire? Is it habitable?”
- Zoning Ordinances (Local Law): These are local rules that govern WHAT you can build, WHERE you can build it, and HOW BIG it can be. They focus on land use and community character. They answer: “Is a house allowed here? Is it too close to the property line? Does it ‘fit’ the neighborhood?”
You can have a perfect, engineer-stamped, 100% code-compliant plan… and still be denied a permit because it violates a simple zoning rule, like being 100 square feet smaller than the “minimum dwelling size” for that neighborhood.
✓ Pro-Tip: Always, always, always talk to your local Zoning Department or Planning Department before you talk to the Building Department. The zoning review comes first. If the project isn’t allowed by zoning, the building department will never even look at your plans.
The “Before You Buy Land” Zoning Checklist
Walk into your local planning department (or check their website) with the parcel number of the land you’re considering. Get clear, written answers to these questions:
- What is the exact zoning designation? (e.g., “R-1,” “Rural-Residential,” “A-1,” etc.)
- Is a single-family residence a permitted (“by-right”) use in this zone? If the answer is “no,” stop here.
- Are there any “alternate dwelling” or “shipping container” specific ordinances? Some progressive areas have them; many conservative areas explicitly ban them.
- What is the minimum required habitable square footage for a primary dwelling? This is a common container home killer. If the zone requires 1,000 sq. ft. and your plan is 640 sq. ft., you have a major problem.
- What are the setback requirements? (Minimum distance from the front, rear, and side property lines.)
- What is the maximum building height? (This affects stacked containers or roof decks.)
- Is the home required to be on a “permanent foundation”? The answer is almost always yes. The International Residential Code (IRC) governs this, and it’s a key part of your plan. Our guide to foundation options breaks this down.
- Am I in a special “overlay” district? This could include historical districts, design review boards, or coastal zones that have extra rules about aesthetics (e.g., “no metal siding”).
- What are the rules for an Accessory Dwelling Unit (ADU)? If your project is a backyard unit, it will have its own set of rules for size, placement, and parking.
HOAs and Design Covenants
There is a third set of rules: Covenants, Conditions & Restrictions (CC&Rs). These are private rules set by a Homeowner’s Association (HOA) or in the property deed. HOA rules can be more restrictive than local zoning.
Even if the city zoning allows container homes, an HOA can (and often does) ban them for purely aesthetic reasons. They might have rules against “metal siding,” “buildings not of conventional construction,” or “temporary-looking structures.” Getting this information is a mandatory step during your due diligence period.
The Costly Gamble of a Zoning Variance
“What if I just get a variance?” A variance is a formal, legal request to be granted an exception to a zoning rule. It is not a simple process. It typically involves:
- A non-refundable application fee (often $500 – $2,000+).
- Submitting professional site plans and a written “hardship” letter.
- Notifying all of your neighbors via certified mail.
- A public hearing in front of a Planning Commission or Zoning Board of Appeals.
- Your neighbors have the right to show up and speak against your project.
You must prove a unique hardship—that the zoning rule, as applied to your specific piece of land, makes it impossible to use the property in a way other owners can. “I want to build a container home” is not a valid hardship. A zoning variance is a last resort, not a primary strategy. For a deeper look at zoning, check our guide to New York zoning as an example.
You can also check with national authorities like FEMA’s flood maps to see if your potential land is in a special flood hazard area, which adds another layer of complex regulations (see Section 4 of this guide).
The “Big One”: Critical Container Home Building Code Mistakes
Once you’ve cleared zoning, you’re ready to prove how you will build. This is where your plans are reviewed by the Building Department, and where they check for compliance with the International Residential Code (IRC) or International Building Code (IBC). As an “alternative” material, a container home is held to a very high standard. These are the technical container home permit mistakes that result in a denial.
Code Mistake #1: The “Container” Itself (The IRC & IBC Problem)
You cannot just buy a container, cut a hole in it, and call it a home. From a code perspective, a used shipping container is just a “used building material.” The building department has no idea what it’s made of, what it has carried, or if it’s structurally sound after its sea life.
The 2021 International Building Code (IBC) first addressed this in Section 3115, “Intermodal Shipping Containers.” While the IBC is technically for commercial buildings, the International Residential Code (IRC) directly references it. IRC Section R301.1.4 states that repurposed containers must comply with the structural provisions of IBC Section 3115. This is the new legal gateway for container homes.
This new section is a game-changer. It essentially requires that repurposed shipping containers be evaluated as a structural material, just like wood or steel. It requires documentation of the container’s original design, verification of its condition (no damage, rust, etc.), and structural analysis. It also defers all structural design to a registered design professional (an engineer). This is why a “DIY-only” approach often fails—the code requires professional involvement.
The Mistake: Assuming a container is a “building” by default.
The Solution: Using “one-trip” containers with verifiable specs and, most importantly, having a PE analyze and stamp the structural plans, which is a core part of our service.
Code Mistake #2: Skipping the Professional Engineer (PE) Stamp
This is the most common and fatal technical mistake. Because a container home is “alternative” and involves modifying a pre-built structural item, your building department will not take your word for it that it’s safe. They will require a state-licensed Professional Engineer to review, approve, and “stamp” your structural plans.
This PE stamp is your partner in safety and your key to approval. The engineer’s stamp signifies that they have personally reviewed the plans and certify that the design is safe and compliant with all local load requirements (snow, wind, and seismic) and the structural modifications (cutting openings) are properly reinforced.
A building official is legally protected when they approve a PE-stamped plan. They have zero protection if they approve a “napkin sketch.” Make their job easy. This is why all of our plans are designed from the ground up to be “PE-Ready.”
Code Mistake #3: A Flawed Foundation Plan
Your container home is only as strong as what it sits on. A common permit mistake is submitting a foundation plan that isn’t specific to your site or is non-compliant with the building code. The IRC is very clear on foundation requirements in Chapter 4, “Foundations.”
Common foundation-related permit denials include:
- Improper Footing Depth: Per IRC Section R403.1.4, footings must be placed at or below the local “frost line” to prevent heaving. Submitting a pier foundation plan in a cold climate (like Colorado) with a 12-inch depth will be rejected instantly.
- Inadequate Drainage: Section R405 requires foundation drainage (like a French drain) for all concrete or masonry foundations in areas with groundwater.
- No Dampproofing: Section R406 requires dampproofing or waterproofing for all below-grade walls.
- Poor Soil Bearing: The plan must be designed for your soil’s “load-bearing capacity.” A plan for solid rock will not work on expansive clay. This is why a geotechnical report is often required.
Our Container Home Foundation Guide explains these options, and our plan sets provide the detailed, compliant drawings your building department needs to see.
Code Mistake #4: Failing the Energy Code (Insulation & Thermal Bridging)
A shipping container is a steel box. It is a highly efficient conductor of heat—exactly what you don’t want. This makes your insulation plan one of the most scrutinized parts of your permit application. The governing standard here is IRC Chapter 11, “Energy Efficiency.”
This chapter sets the minimum “R-values” (a measure of thermal resistance) for your walls, floor, and ceiling, based on your climate zone. You can find your zone from an authority like the Department of Energy.
The single biggest insulation mistake is Thermal Bridging. This is where the steel shell and any interior steel framing conduct heat right past your insulation, creating cold spots, condensation, and mold. Your plan must show how you are creating a “continuous thermal break.”
Here is a breakdown of common insulation mistakes that lead to permit denial:
| Insulation Type | Common Permit-Killing Mistake | Relevant Code Concept (IRC Chapter 11) |
|---|---|---|
| Closed-Cell Spray Foam (Interior) | Not specifying enough thickness (e.g., 2 inches) to meet the R-value requirements for your climate zone. | Fails to meet prescriptive R-value table in IRC N1102.1. |
| Framed with Batts (Interior) | Failing to account for thermal bridging. The steel studs and container wall will transfer cold right through the batts. | Fails to provide “continuous insulation” (ci), which is a key component of the Building Thermal Envelope (N1102). |
| Exterior Insulation (Outsulation) | Using the wrong type of insulation (e.g., one not rated for exterior use) or an improper Water-Resistive Barrier (WRB). | Fails IRC R703 (Exterior Covering) and N1102 (Thermal Envelope) requirements for weather and moisture protection. |
| Open-Cell Spray Foam (Interior) | Failing to specify a separate vapor retarder. Open-cell foam is vapor-permeable, which can lead to condensation on the cold steel wall. | Fails vapor retarder requirements in IRC N1102.4.1, which are critical in steel-frame construction. |
For a complete deep-dive, please see our Ultimate Container Home Insulation Guide.
Code Mistake #5: Non-Compliant Habitability & Egress
A home must be “habitable.” The IRC has strict, non-negotiable rules for this in Chapter 3, “Building Planning.” A container’s small, narrow dimensions make these rules a challenge.
- Ceiling Height (R305.1): Habitable spaces (living, sleeping, eating) must have a ceiling height of not less than 7 feet. This is why standard 8’6″ containers are difficult. After adding insulation (top and bottom) and finishes, you can easily end up with a 6’10” ceiling, which is a code violation. This is why High-Cube (9’6″) containers are the professional standard.
- Minimum Room Dimensions (R304): Habitable rooms must be at least 70 sq. ft. and not less than 7 feet in any horizontal dimension. A container’s 7’8″ interior width leaves very little room for error after framing and drywall.
- Emergency Egress (R310): Every sleeping room must have an emergency escape and rescue opening. This can be a door, but it’s usually a window. It must have a minimum net clear opening of 5.7 sq. ft. (5.0 for grade-floor), a minimum height of 24 inches, a minimum width of 20 inches, and a sill height no more than 44 inches from the floor. Submitting a plan with only a tiny, high window in a bedroom is an instant denial.
Code Mistake #6: No Plan for MEP (Mechanical, Electrical, Plumbing)
Many first-time builders submit great architectural plans but completely forget about the “systems.” Your permit application must include detailed plans for Mechanical (HVAC), Electrical, and Plumbing. The code dedicates over 20 chapters to these systems (IRC Chapters 12 through 43). The mistake isn’t a specific violation; it’s the absence of a plan.
Your plans must show:
- Mechanical: How will the home be heated and cooled? Where will the HVAC unit go? How will fresh air be provided (required by code, see R303.4)?
- Electrical: Where is the panel? Where are the outlets, switches, and lights? How will wire be run? (You can’t just run wire inside a steel corrugation).
- Plumbing: Where do the pipes run? How will they be protected from freezing? How do the drains vent?
Our permit-ready plans include these MEP layouts specifically to avoid this common mistake and show the reviewer you have a complete, well-thought-out project.
Special Code Mistakes: Ignoring Wind, Snow & Flood Zones
Building codes are not one-size-fits-all. They are adapted locally to protect against specific geographic risks. Failing to check your local “Climatic and Geographic Design Criteria” (found in IRC Table R301.2) is a massive error.
High-Wind Zone Errors
If you live in a hurricane-prone region (like Florida or the Texas coast), your building must meet special requirements for high-wind resistance (IRC R301.2.1). A container is heavy, but the “uplift” on a roof is incredibly powerful. Your foundation plan and any roof attachments must be specifically engineered to resist these forces. The connections between stacked containers are especially critical.
Flood & Coastal Zone Errors
If your property is in a “flood hazard area” as mapped by FEMA, your project is subject to IRC Section R322, “Flood-Resistant Construction.” This is one of the most complex sections of the code. It will require, at a minimum, that your lowest floor be elevated above the Base Flood Elevation (BFE). In coastal V-Zones, it will require an “open” foundation (like piers) designed to let storm surges pass underneath. Submitting a slab-on-grade foundation plan for a property in a V-Zone is a non-starter.
Process Mistake: Submitting “Napkin Sketch” Plans
You may be a brilliant builder, but the plan reviewer doesn’t know that. They only know what’s on the paper in front of them. A common mistake is submitting incomplete, non-professional, or “sketchy” construction documents.
💡 A Helpful Tip: Think of your plan reviewer as your first and most important inspector. Their job is to find problems on paper (where they are cheap to fix) before you build them in real life (where they are expensive to fix). A complete plan set shows respect for their time and demonstrates your professionalism.
Per IRC Section R106 (Construction Documents), a permit-ready plan set is expected to include all of the following:
- Site Plan (R106.2): A top-down view of your entire property, drawn to scale, showing all property lines, setbacks, existing structures, and the exact proposed location of the new container home.
- Floor Plans: Detailed, dimensioned plans of each floor, showing all rooms, doors, windows, and the use of each space.
- Exterior Elevations: Drawings of all four sides of the home, showing finished materials, window/door placements, and the final “grade” or ground level.
- Structural Plans: The “bones” of the house. This includes foundation details, framing plans, details for reinforcing all cuts/openings, and all connection details. This is the section that must have the PE stamp.
- MEP Plans: Layouts for Mechanical (HVAC, ventilation), Electrical (outlets, panel, lights), and Plumbing (pipes, drains, vents).
- Energy Compliance Report: Often a printout from a software (like REScheck) proving your insulation, windows, and HVAC system meet the requirements of IRC Chapter 11.
Submitting an incomplete package is the fastest way to get a denial and be sent to the back of the line.
The Build Blunder: Failing Phased Inspections
Getting the permit isn’t the end of the process; it’s the beginning of the next one. Your permit is permission to build, but it’s conditional on a series of inspections.
The Inspection Gauntlet: What to Expect
Per IRC Section R109 (Inspections), a building inspector must personally visit your site and approve the work at critical phases. The cardinal sin—and the most costly container home permit mistake during the build—is covering up work before it has been inspected.
If you pour concrete before the “Foundation Inspection” (R109.1.1) for the rebar, you will fail. If you put up drywall before the “Frame and MEP Inspection” (R109.1.2 & R109.1.4), you will fail. Failing means the inspector can issue a Stop Work Order (R114) and legally require you to tear out the finished work to prove the work underneath was done correctly.
Your build must be planned around this inspection schedule:
- Foundation Inspection: Done after trenches are dug and rebar is set, but before concrete is poured.
- Plumbing/Mechanical/Electrical Rough-in: Done after all pipes, wires, and ducts are run through the studs, but before any insulation or drywall is installed.
- Framing Inspection: Done after the rough-in inspections are passed, to check all structural elements, bracing, and connections.
- Insulation Inspection: Done after insulation is installed, but before drywall. The inspector will check for full, gap-free coverage.
- Final Inspection: Done after all work is 100% complete. The inspector checks all systems, safety features (like smoke alarms), and final grading.
The Final Hurdle: The Certificate of Occupancy (CO)
Only after you have passed the Final Inspection will the building department issue your Certificate of Occupancy (CO), as defined in IRC Section R110. This is the document that makes it legal to live in your new home. Without it, you cannot get homeowner’s insurance, and you may not be able to get permanent utilities. The CO is the ultimate goal of the entire permit process.
Hiring Mistake: Choosing an Unlicensed or Inexperienced Team
The solution to all these mistakes is to have a professional team. The final mistake is hiring the wrong team.
Hiring Mistake #1: The Unlicensed Contractor
A contractor who offers a “cash deal” and can “start tomorrow” is a giant red flag. In most states, only a licensed and insured contractor can legally pull permits. If you hire someone unlicensed, you, the homeowner, may be forced to pull an “owner-builder” permit, which places all the liability, risk, and responsibility squarely on your shoulders. A professional builder knows the inspection cadence, has a relationship with the inspectors, and understands the code. It is worth paying for their expertise.
Hiring Mistake #2: The Inexperienced Professional Engineer
Not all PEs are created equal. An engineer who has spent 30 years designing concrete parking garages may not understand the unique structural dynamics of a modified shipping container. They may be overly conservative, requiring far more steel reinforcement than is necessary, driving up your costs. Or they may be under-experienced, missing key details that the plan reviewer will catch.
When you contact us, we can often refer you to PEs in our network who have experience with container homes and our plan sets. They can review and stamp our plans efficiently, saving you time and money.
The Solution: How Permit-Ready Plans Mitigate These Risks
This 4,500-word guide can be overwhelming, but it’s not intended to scare you. It’s intended to prepare you. The permit process is complex, but it is 100% manageable with the right preparation.
The single best way to avoid these mistakes is to start with a professional, comprehensive set of plans. That is the entire mission of PermitContainerHomes.com.
Our permit-ready plan sets are designed by professionals who understand the IRC and IBC. They are your solution to the most common container home permit mistakes:
- ✅ They solve the “Code” problem: Our plans are based on established US building codes, not just pretty pictures.
- ✅ They solve the “PE” problem: Our structural plans are already engineered, giving your local PE a 90% complete package to review, adapt, and stamp. This saves them hours of work and saves you thousands in fees.
- ✅ They solve the “MEP” problem: Our plans include the Mechanical, Electrical, and Plumbing layouts that reviewers demand.
- ✅ They solve the “Habitability” problem: We design with code-compliant ceiling heights (using high-cubes) and proper egress windows from Day 1.
- ✅ They solve the “Documentation” problem: You don’t submit a “napkin sketch.” You submit a complete, professional package that makes it easy for the building department to say “Approved.”
A Helpful Add-On Service
We’re here to support you even after the sale. If you love one of our designs but your local code requires a window to be moved or a footing to be changed, we offer a plan modification service after purchase to help you customize it. Just contact us for a quote!
❓ Frequently Asked Questions (FAQ)
What is the single biggest container home permit mistake?
The biggest mistake is underestimating the entire process. This includes underestimating the cost (PE stamps, site plans, soil reports, and fees are expensive), the timeline (a 3-6 month approval process is common), and the technical scrutiny your project will face. The second biggest mistake is buying land before verifying with the local zoning department that a container home is even allowed.
Can I get a permit for a container home in my state?
Almost certainly, yes. Building permits are not issued by states, but by local jurisdictions (cities or counties). There is no state that has a blanket ban on container homes. However, your local city or county might. Success depends 100% on your local zoning and building department rules. You must call them first.
Do I really need a Professional Engineer (PE)?
Yes. We cannot state this emphatically enough. Because you are modifying a structural item (the container) by cutting holes for doors and windows, 99.9% of building departments will require a state-licensed PE to review and stamp the plans to certify they are structurally sound and safe for your area’s specific wind, snow, and seismic loads, as required by IRC Section R301.1.3.
What’s the difference between zoning and building codes?
Zoning and planning ordinances decide WHAT you can build and WHERE on your property (e.g., “Single-family homes only,” “Must be 1,200 sq. ft. minimum,” “Must be 20 feet from the road”). Building codes (like the IRC/IBC) decide HOW you must build it (e.g., “The foundation must be 36 inches deep,” “The bedroom window must be 5.7 sq. ft.,” “The wall insulation must be R-21”). You must satisfy both to get a permit.
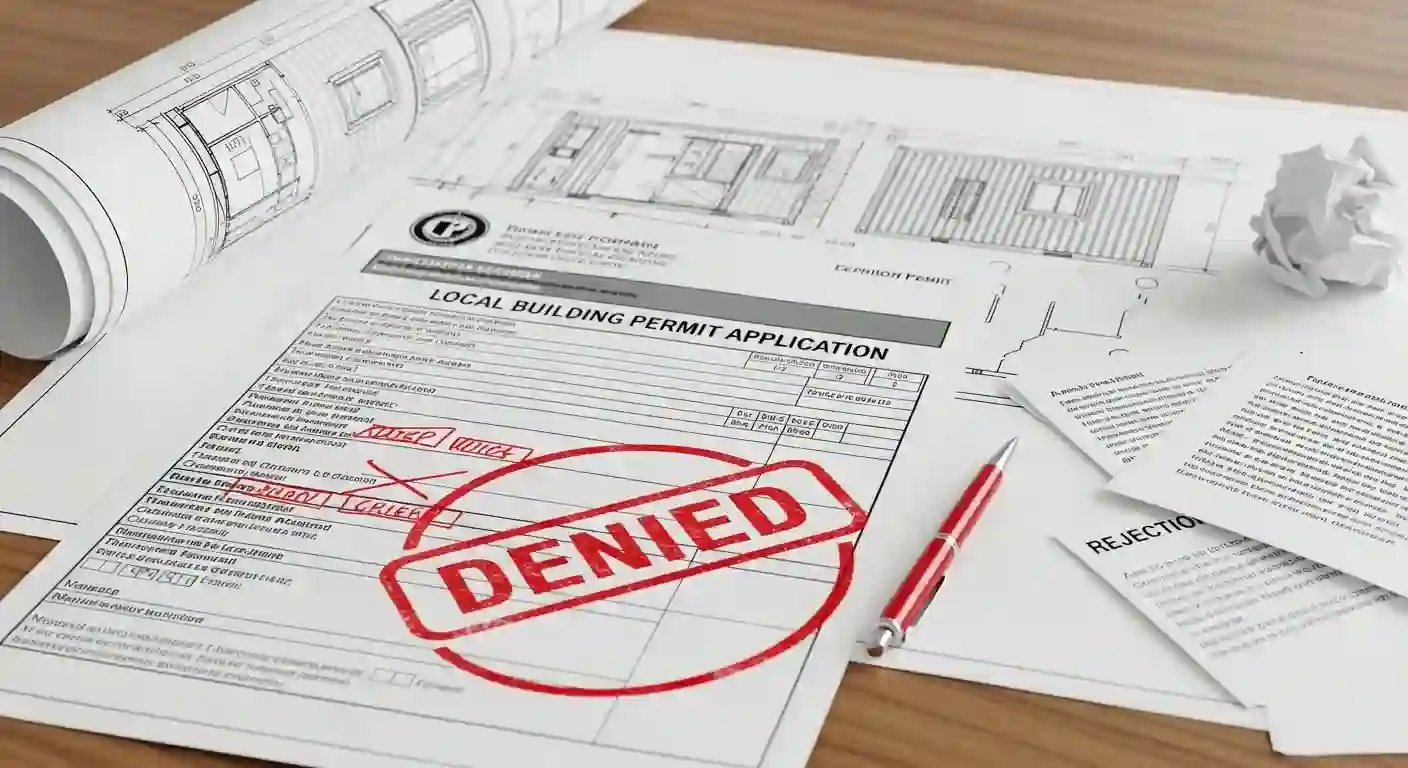
What happens if my permit application is denied?
A denial is almost never a final “no.” It’s a “not yet.” The building department will issue a “Correction Notice” or “Comment Letter” listing the specific items that are non-compliant. You must then work with your designer or engineer to fix every item on that list and resubmit the plans. This is a normal part of the process, but it can add weeks or months to your timeline, which is why starting with a strong plan set is so important.
Can I use a “one-trip” container for my home?
Yes, and we highly recommend it. A “one-trip” container is as close to “new” as you can get. It is structurally sound, free of rust or major dents, and has a known history. Using an old, multi-use container is a permit mistake because it’s impossible to verify its structural integrity or what hazardous materials it may have carried, which is a major concern for inspectors.
What are the most common inspection failures?
The most common and costly failure is covering work before it’s inspected (e.g., pouring concrete over rebar, or hanging drywall over wiring and plumbing). Other common failures include improper foundation drainage (per IRC R405), inadequate insulation (violating IRC Chapter 11), and improper structural connections (like welds or bolts) that don’t match the PE’s stamped plans.
Do your plans guarantee permit approval?
No. We cannot and do not guarantee permit approval. This is because every city, county, and state has its own unique zoning ordinances, code amendments, and climate requirements (snow, wind, seismic) that we cannot possibly pre-build for. Our plans are “permit-ready,” meaning they are 100% complete, professional, and designed to be compliant with the base International Residential Code. They are specifically created to be handed to your local PE, who will then review and adapt them for your local requirements before stamping them for submission. This process gives you the greatest chance of success and is far faster and cheaper than starting from scratch.
Why can’t I just use a standard container for a 7-foot ceiling?
A standard container is 8’6″ on the exterior. After you add a 4-inch insulated floor system and a 4-inch insulated ceiling system, your finished interior ceiling height will be around 7’10”. This is technically code-compliant (per IRC R305.1). However, a High-Cube (9’6″ exterior) gives you a finished 8’10” ceiling, which feels much more open and provides crucial space to run ducts, wiring, and plumbing without compromising headroom.
What is the “Certificate of Occupancy” (CO) and why do I need it?
The Certificate of Occupancy (or “CO”) is the final document issued by your building department after your project passes its Final Inspection (per IRC R110). It is the official document that legally declares the structure is safe to be inhabited. You typically cannot get homeowner’s insurance or finalize your permanent utility connections (power, water) until you have been issued a CO.
Avoid These Mistakes from Day One
You don’t have to navigate this complex process alone. Our permit-ready plans are the solution. They are professionally drafted, based on IRC and IBC standards, and include the structural, architectural, and MEP details your building department and engineer need to see.
Start your project with a foundation of confidence and clarity.
Browse Our Permit-Ready PlansImportant: Our plans are permit-ready but require review and stamping by a local licensed Professional Engineer (PE) in your jurisdiction. Final approval is subject to local building codes and regulations.
Financial Disclaimer: Costs vary significantly by location, site conditions, and material choices. These are estimates for planning purposes only.
Legal Disclaimer: This article is for informational purposes only and does not constitute building code or legal advice. We recommend consulting your local building department and a licensed engineer to verify all requirements for your specific project.
Refund Policy: Due to the digital nature of our plans, all sales are final. Please review our Refund Policy for details.