Your Container Home Construction Timeline: The Essential 12-Step Plan
A realistic, phase-by-phase container home construction timeline for future homeowners, navigating the process from plan approval to final move-in.
Achieving Your Container Home Construction Timeline Goal
Welcome to the most exciting part of your journey! Getting a realistic container home construction timeline is crucial for managing your budget, coordinating contractors, and setting clear expectations. At PermitContainerhomes.com, our goal is to serve as your helpful and professional guide, outlining the path from paper plans to a physical home.
Building a container home is an incredible, complex process that marries traditional construction methods with modern, modular design. The reality is, the timeline is highly variable, but understanding the 12 essential phases and knowing where potential delays occur is your greatest advantage. Our core philosophy is transparency: the foundation of a swift build is a rock-solid, permit-ready plan. Get started faster with our instant-download plans, the quickest way to complete Phase I and step onto your build site.
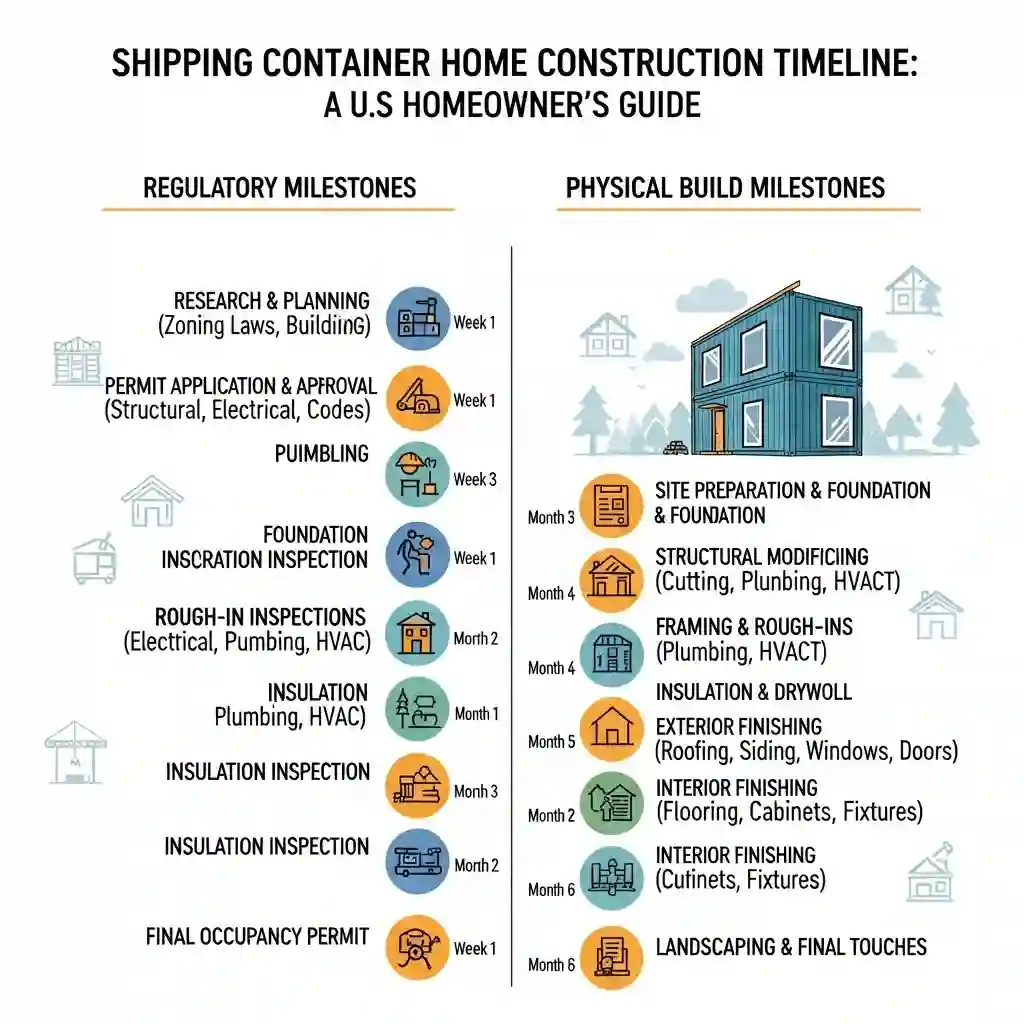
Below is a detailed, 12-step master timeline. This isn’t just a list of steps; it’s a breakdown of the regulatory and physical milestones required for a successful, code-compliant container home build across the United States.
Timeline at a Glance: The 12-Step Framework
While the total process can range from 3 to 18+ months, the phases of work are consistent. Use this table as your master checklist. Note: Timeframes are estimates and can run concurrently (e.g., container modification can happen off-site while you wait for permits).
| Phase | Step | Estimated Timeframe | Key Milestone / Inspection |
|---|---|---|---|
| I: Planning | 1. Plan Procurement | 1 Day – 6 Months | Acquire engineered plans. |
| 2. Land & Zoning | 4 Weeks – 6 Months | Zoning clearance received. | |
| 3. Engineering Review | 2 – 6 Weeks | PE Stamp acquired. | |
| 4. Permit Approval | 2 Weeks – 4 Months | Building Permit Issued. | |
| II: Foundation | 5. Site Prep & Utilities | 1 – 4 Weeks | Site cleared; utility trenches dug. |
| 6. Foundation Pour | 1 – 3 Weeks | Foundation Inspection (Pass). | |
| III: Structural | 7. Container Mod & Placement | 1 – 3 Weeks | Containers welded to foundation. |
| 8. Structural Framing | 2 – 6 Weeks | Framing Inspection (Pass). | |
| 9. Rough-In (PME) | 2 – 4 Weeks | Rough-In Inspections (Pass). | |
| 10. Insulation & Drywall | 2 – 4 Weeks | Walls closed (Envelope sealed). | |
| IV: Finishing | 11. Interior & Exterior Finishes | 4 – 12 Weeks | Fixtures set; siding on. |
| 12. Final Inspection & C.O. | 1 – 2 Weeks | Certificate of Occupancy! |
Phase I: The Pre-Construction & Planning Core (Steps 1-4)
This phase is 90% paperwork and 10% patience. It’s often the most frustrating because it involves waiting for bureaucratic processes, but it’s critical. A well-prepared application can cut months off your final container home construction timeline.
Step 1: Foundational Design & Plan Procurement
Goal: Secure complete, structurally-verified architectural and mechanical plans for your specific container home model.
Timeframe: 1 Day to 6+ Months.
- Our “Permit-Ready” Plans (1 Day): If you choose our instant-download plans, this phase is instantaneous. Our plans are engineered to be code-compliant, limiting your next steps to site-specific customization and local PE stamping.
- Custom Architectural Design (6+ Months): If you pursue a fully custom design, this involves hiring an architect, numerous design iterations, engineering reviews, and a long lead time before you can even *apply* for a permit.
Pro Tip: Starting with a pre-engineered design significantly de-risks your project and drastically reduces initial time investment. Our plans are the foundation that accelerates the entire process.
Step 2: Securing Land & Zoning Clearance
Goal: Confirm your build site is legally sound for a container home and all site-specific issues (e.g., setbacks, utility hookups) are planned for.
Timeframe: 4 Weeks to 6 Months.
Code/Permit Focus: The local building department uses the site plan (or plot plan) to assess your project. This plan must clearly delineate lot lines and show the size and location of the new construction. Furthermore, access to a legal sewage disposal method—either a public sewer or an approved private sewage disposal system (like septic)—is mandatory under code.
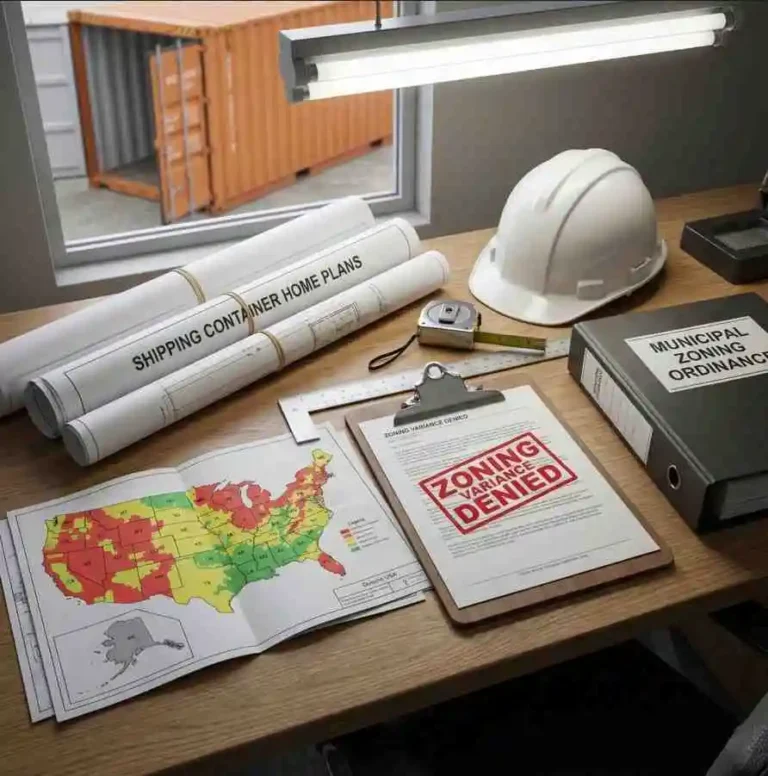
A successful container home construction timeline hinges on resolving these site-specific requirements early. For example, local rules dictate the minimum required distance from your home to property lines, known as Fire Separation Distance. This distance then impacts the necessary fire-resistance rating of your exterior walls. We strongly advise consulting your local planning department to verify all zoning and setback requirements. Need more information on this critical topic? Our state-specific guides delve into zoning complexity, a frequent cause of unexpected delays.
Step 3: Engineering Review & PE Stamping
Goal: Obtain the required seal from a Professional Engineer (PE) licensed in your state, affirming the structural integrity and compliance of the plans for your specific site conditions.
Timeframe: 2 to 6 Weeks.
The PE review is an indispensable part of establishing the legal framework for your container home construction timeline. While our plans are structurally sound and code-informed, final permit approval requires review and stamping by a local licensed Professional Engineer (PE) in your jurisdiction. They check the plans against local environmental factors and state-specific code amendments. This includes:
- Local snow load calculations.
- Wind load (hurricane/tornado) requirements.
- Seismic (earthquake) zone data.
- Local soil bearing capacity for the foundation design.
The structural design details for intermodal shipping containers must specifically comply with adopted structural provisions, often referencing codes like IBC Section 3115 or the International Residential Code (IRC). This is a collaborative step necessary for your safety and success. The PE ensures that elements like wall reinforcement, container welding modifications, and foundation design are appropriate for your specific site’s soil type and geographic criteria.
Step 4: Permit Application Submission & Approval
Goal: Receive the official authorization to begin construction (the Building Permit).
Timeframe: 2 Weeks to 4 Months.
Once you have the stamped plans, you will assemble your “Permit Package.” The building official will then examine the application and documents to ensure compliance with the code before issuing the permit. A complete package is essential for speed.
Your package will typically include:
- The completed building permit application form.
- Multiple sets of the PE-stamped building plans.
- A detailed site plan (plot plan) showing the house, setbacks, and utilities.
- Energy code compliance calculations (e.g., REScheck).
- (If applicable) Septic system design and permit.
- (If applicable) Well permit or letter from the water utility.
Pro Tip for Speed: The single most common cause of delay in a container home construction timeline is an incomplete or poor-quality permit package. By investing in our high-quality plans, you drastically increase the likelihood of rapid approval on the first submission. The building official is “authorized to reject such application in writing, stating the reasons therefor” if the documents do not conform. We aim to eliminate those reasons!
Phase II: The Container and Foundation Core (Steps 5-6)
With the permit in hand, the tangible part of the build starts. This phase is about establishing the bedrock of your home.
Step 5: Site Preparation & Utility Connections
Goal: Clear the land, run temporary power/water, excavate, and set up for the foundation contractor.
Timeframe: 1 to 4 Weeks.
Preparation begins immediately after permit issuance, focusing on readying the site for heavy machinery. All trees, stumps, and debris must be removed from the area of the proposed building and fill material must be properly graded and compacted. Utility connections are key: this is where your preliminary plans become literal trenches in the ground. Water supply systems must connect to a public source or an approved individual water supply, and sanitary drainage must connect to a public sewer or an approved private sewage disposal system.
Step 6: Foundation Pour & Footing Inspection
Goal: Complete the installation of the foundation and obtain the first critical inspection sign-off.
Timeframe: 1 to 3 Weeks (excluding curing time).
Your PE-stamped plans will specify the exact foundation required. Common types for container homes include:
- Slab-on-Grade: A single, thick concrete slab. This is a durable option, but all under-slab plumbing must be perfectly placed *before* the pour.
- Pier Foundation: Concrete footings (piers) are poured at the corners and other load-bearing points. This is often the simplest and most cost-effective, lifting the container off the ground and allowing easy access to utilities underneath.
- Crawl Space / Basement: A full perimeter wall (either poured concrete or block). This is more complex and costly, but provides excellent utility access, storage, or even additional living space.
The most critical step here is the Foundation Inspection, which must be requested before concrete is placed.
The inspection is made after excavations are complete, any required forms are erected, and any required reinforcing steel (rebar) is in place and supported prior to the placing of concrete. This includes excavations for thickened slabs and requirements for wood foundations.
Inspectors will verify compliance with depth and protection requirements, particularly: footing bottom placement below the frost line, proper depth below the undisturbed ground surface (minimum 12 inches), and proper reinforcement in areas subject to flood or seismic loads.
Phase III: The Structural & Rough-In Core (Steps 7-10)
This is where your container shell is transformed into a habitable structure, setting the stage for all mechanical and fire safety systems. Efficiency and accuracy in this phase directly impact your schedule.
Step 7: Container Modification & Placement
Goal: Transport containers to the site, securely fasten them to the foundation, and execute structural modifications (cutting and welding for doors, windows, and openings).
Timeframe: 1 to 3 Weeks.
This is a major milestone. We recommend sourcing “one-trip” containers, which are nearly new and have minimal rust or dents. A crane will lift the containers onto your cured foundation. They must be safely anchored (welded or bolted) to the foundation to maintain a continuous load path that resists all environmental and design loads (wind, seismic, etc.).
Structural modification must be done by certified welders, and in accordance with the design specifications for lateral force-resisting systems. This is not a place to cut corners.
🛠️ Structural Modification Pro Tip
If you love this container home design but need to move a window, change a door, or make another structural tweak, modifying the pre-engineered plans in the middle of this phase is highly risky. Instead, plan ahead: we offer a plan modification service after purchase to help you customize the design with structural verification. Just contact us for a quote!
Step 8: Structural Framing & Framing Inspection
Goal: Complete all secondary framing (wood or steel studs) and pass the intermediate inspection before covering the walls.
Timeframe: 2 to 6 Weeks.
After the containers are in place, interior framing (typically wood 2x4s or light-gauge steel studs) begins. This framing creates the wall cavities for insulation and utilities and provides a flat surface for drywall. This step also includes any necessary structural elements like shear walls and bracing, as specified in your plans.
This inspection is crucial and generally occurs before the installation of interior sheathing and after the roof sheathing, framing, firestopping, draftstopping, and bracing are in place, and after the rough PME systems are approved. The inspection verifies proper sizing, spacing, and fastening of all wood or cold-formed steel structural members.
Step 9: Rough-In Inspections (Plumbing, Mechanical, Electrical)
Goal: Install all pipes, wires, and ducts that will eventually be concealed within the walls and ceilings, and pass all preliminary inspections for these systems.
Timeframe: 2 to 4 Weeks (PME installation) + Inspection Time.
The rough-in is a multi-step inspection required before insulation and sheathing are applied. As expert guides, we stress the importance of understanding this step, as failure here can halt your entire container home construction timeline. The typical order is Plumbing/Mechanical first, then Electrical.
The rough inspection of plumbing, mechanical, gas, and electrical systems must be made prior to covering or concealment, and before fixtures or appliances are set or installed. Inspectors verify key safety points, such as proper electrical wiring methods, gas piping installation, and plumbing drainage/venting systems.
- Electrical Rough-in: Requires compliance with the National Electrical Code (NFPA 70). Inspections check for correct wire gauge, proper grounding and bonding, and required placement of boxes and conduit before walls are closed up.
- Plumbing Rough-in: Verifies proper installation, testing, and approval of all concealed water supply and drainage systems. Inspections ensure proper sizing of drain pipes and verify the installation of traps and vents to prevent the emission of sewer gases.
- Mechanical Rough-in: Focuses on duct systems (for HVAC), exhaust systems (for bathrooms/kitchens), and combustion air provisions for fuel-burning appliances.
Once all rough-in inspections pass, the envelope can be closed up.
Step 10: Insulation, Firestopping, & Wall Covering Installation
Goal: Complete the thermal and fire-safety envelope by installing insulation, vapor barriers, fireblocking, and interior wall sheathing.
Timeframe: 2 to 4 Weeks.
This phase is critical for energy efficiency and life safety. Insulation material must meet specific flame spread and smoke-developed indices (not to exceed 25 and 450, respectively, when tested per ASTM E84 or UL 723). Choosing your insulation is a major decision:
| Insulation Type | Typical R-Value (per inch) | Pros | Cons |
|---|---|---|---|
| Spray Foam (Closed-Cell) | R-6 to R-7 | Highest R-value; creates air/vapor barrier; adds rigidity. | Most expensive; requires professional installation; off-gassing. |
| Rigid Foam Panels (EPS/XPS) | R-4 to R-5 | Good R-value; DIY-friendly; moisture resistant. | Must air-seal all joints; flammable (requires fire barrier). |
| Mineral Wool Batts | R-3 to R-4 | Fire-resistant; sound-dampening; mold/pest resistant. | Lower R-value (needs thicker walls); requires vapor barrier. |
You can explore our in-depth container home insulation guide for more system comparisons.
- Fire Safety: All concealed spaces in wood-framed walls must be fitted with fireblocking to resist the free passage of flame. This material can be 2-inch nominal lumber, gypsum board, or mineral wool installed at ceilings, floors, and horizontally at maximum 10-foot intervals.
- Drywall: Interior wallboard (gypsum board) is installed. If fire-resistance-rated construction is required (e.g., between a garage and living space per Table R302.6), an inspection of the lath or gypsum board is required before taping and finishing.
Phase IV: The Finishing & Final Approval Core (Steps 11-12)
This is the final stretch of your container home construction timeline, where the finishing details come together and the local authority certifies your home for occupancy.
Step 11: Interior & Exterior Finishes
Goal: Complete all non-concealed systems, install trim, flooring, siding, permanent fixtures, and final equipment (HVAC, water heater, etc.).
Timeframe: 4 to 12 Weeks.
This phase is primarily driven by design choices and trade coordination. Carpenters install cabinetry, flooring, and interior trim. Plumbers set the final fixtures (toilets, sinks, faucets), ensuring adherence to the clearances dictated by the International Plumbing Code. Electricians install switches, receptacles, and lighting fixtures, connecting them to the rough-in wiring. HVAC technicians connect and test the heating/cooling systems.
On the exterior, this is when siding (if any) is installed over the insulation, and any final roofing or flashing is completed.
📐 Designing for Health & Safety
Even aesthetic choices are regulated by code. For instance, the wall and floor surfaces in bathtub/shower spaces must be finished with a nonabsorbent surface extending at least 6 feet above the floor. All appliances, including water heaters, must be installed and securely anchored to prevent movement and overturning, a critical safety requirement in high-wind and seismic zones.
Step 12: Final Inspection & Certificate of Occupancy (C.O.)
Goal: Pass the final inspection and receive the Certificate of Occupancy, officially completing your construction timeline.
Timeframe: 1 to 2 Weeks.
The final inspection is made once all permitted work is complete and before occupancy. The inspector will verify all life safety systems are installed and functional, from smoke and carbon monoxide alarms to the final dimensions of egress openings and stairway components (handrail height, tread depth, etc.).
A building or structure “shall not be used or occupied in whole or in part” until the building official has issued a Certificate of Occupancy. The C.O. confirms the structure has been inspected for compliance with the code and documents key information, including the address and the edition of the code under which the permit was issued.
What if you fail? This is common! The inspector will provide a “punch list” of correction items. Your contractors must fix these items, and then you schedule a re-inspection. Once all items are cleared, you get your C.O. and can legally move in. Visit the International Code Council (ICC) to find detailed checklists to prepare your site for this final, all-important milestone.
Timeline Killers: How to Manage Delays & Risks
Even the best plan can face delays. Your container home construction timeline is a guide, not a guarantee. Here are the most common “timeline killers” and how to mitigate them.
Top 5 Timeline Delays & Mitigations
- Delay: Permit & Zoning (Phase I)
Mitigation: This is the biggest variable. Mitigate it by starting with professional, permit-ready plans. Engage your building department *before* buying land. Submit a 100% complete permit package—missing documents will send you to the back of the line.
- Delay: Contractor Scheduling
Mitigation: Good contractors are booked months out. Get on contractor schedules *as soon as your permit is submitted* (with a contingency for approval). Have contracts with clear start/end dates. A delay with your foundation contractor can stop the entire project for weeks.
- Delay: Failed Inspections
Mitigation: Do not cover *any* work before it’s inspected. A failed rough-in inspection might require tearing out drywall. Use licensed, insured tradespeople who know the local code and study your stamped plans to ensure work is done correctly the first time.
- Delay: Weather
Mitigation: You can’t control the weather, but you can plan for it. Heavy rain can delay foundation pours for weeks. Snow can halt all exterior work. Build buffer days into your schedule, especially if building during a rainy or cold season.
- Delay: Material & Financing
Mitigation: Order long-lead-time items (like custom windows or cabinets) *months* in advance. For financing, ensure your construction loan “draws” (disbursements of money) are aligned with your builder’s payment schedule to avoid work stoppages.
❓ Frequently Asked Questions about the Container Home Construction Timeline
How long is the fastest possible container home construction timeline?
The absolute fastest timeline is typically achieved when the client begins with a pre-designed, permit-ready plan (eliminating the design phase of 1-6 months), is in a cooperative jurisdiction, and has secured their containers and contractors in advance. A highly optimized schedule could compress the entire process down to 3-6 months. However, this assumes no major delays in the PE stamping, a swift 2-week permit review (which is rare), excellent contractor availability, and perfect weather. The biggest constraint is always the permit approval time (Step 4).
What causes the longest and most common delays in the entire process?
The longest and most common delays are consistently found in Phase I (Pre-Construction & Planning). Specifically, they are:
- Permit Application Review: As noted above, this highly variable step can take weeks or many months depending on the jurisdiction’s backlog and familiarity with container homes.
- Zoning Disputes: Discovering post-purchase that your land does not permit container construction (Group R-3) or requires excessive setbacks is a project-killer.
- Contractor and Subcontractor Availability: Skilled trades, especially certified structural welders or builders experienced in container home modification, often have long lead times.
Does the container modification and cutting occur on-site or off-site, and how does this affect the timeline?
Container modification can occur either off-site (pre-fabricated) or on-site. Both methods impact your timeline differently:
- Off-Site Fabrication: The container is cut, framed, insulated, and sometimes partially finished in a controlled factory environment while local permitting (Steps 3-4) is ongoing. This significantly overlaps and shortens the overall construction timeline, reducing weather-related delays.
- On-Site Fabrication: The container is delivered (Step 7) and then cut and modified directly on your foundation. This is more common and often less expensive, but the work cannot start until the permit is issued and the Foundation Inspection (Step 6) is approved.
Can I act as my own General Contractor (GC)?
In many US jurisdictions, yes, you can act as your own GC (often called an “owner-builder”). This can save you 15-25% of the total project cost. However, it will almost certainly extend your timeline. As the GC, you are responsible for hiring, scheduling, and paying all subcontractors (excavators, plumbers, electricians, etc.), ordering materials, and scheduling all 10+ inspections. It is a full-time job and should only be attempted if you have significant construction knowledge and a flexible schedule.
How does financing (a construction loan) impact the timeline?
Financing adds time to Phase I. Securing a construction loan is a complex process that can take 30-90 days. The lender will require your stamped plans, a detailed budget, and your contract with a builder. Furthermore, during construction (Phases II-IV), the bank releases money in “draws” *after* work is completed and inspected. If an inspection fails or paperwork is delayed, the bank won’t release the draw, which can cause a work stoppage until your contractors are paid.
What’s the difference between a building code and a zoning ordinance?
This is a critical distinction. Think of it this way:
- Zoning Ordinances (decided by the Planning Dept.) tell you WHAT you can build and WHERE on your property (e.g., “You can build one single-family home,” “It must be 50 feet from the road,” “It cannot be taller than 35 feet”).
- Building Codes (decided by the Building Dept.) tell you HOW you must build it (e.g., “Your foundation must be 36 inches deep,” “Your wires must be 12-gauge,” “You must have 2×6 studs for this wall”).
You must comply with both. Your project can be 100% code-compliant but still be rejected if it violates zoning.
Are the required inspections for a container home different from a traditional home?
No, for all intents and purposes, the core inspection process for a code-compliant container home construction timeline is the same as a stick-built home. Inspectors follow the same sequence prescribed in the International Residential Code (IRC) Chapter 1: Administration, checking for the same life-safety and structural compliance points (Foundation, Rough-in, Framing, Final). The only difference is the *documentation* required at the permitting phase (Phase I), where detailed engineering drawings must specifically demonstrate how the container modification meets the code’s performance criteria.
How can a future container home owner prepare to minimize risk and delays?
Preparation is the single most effective tool against delays. We humbly suggest three key areas of focus:
- Front-Load Planning: Start with fully vetted plans like ours. Our designs simplify the structural verification process that typically slows down local building officials who may be unfamiliar with container construction. This drastically accelerates Phase I.
- Consult Early and Often: Before buying land or pouring concrete, speak with a local Professional Engineer (PE) and the planning department. Show them the plans and confirm all zoning and foundation requirements for your specific site.
- Secure Financing: Have your total project budget secured. Financial delays (waiting for loan disbursement) can halt work in progress, making it difficult to re-secure the same quality contractors for an extended period.
Ready to Start Your Project Faster?
The foundation of a smooth container home construction timeline is a set of professionally prepared plans. Skip the 6-month custom design process and move directly to PE stamping with our comprehensive, instant-download plans.
Browse Our Permit-Ready Plans →Important Notices & Disclaimers:
PE Approval Disclaimer (CRITICAL): Important: Our plans are permit-ready but require review and stamping by a local licensed Professional Engineer (PE) in your jurisdiction. Final approval is subject to local building codes and regulations.
No Legal Advice: We recommend consulting your local building department to verify all requirements.
Financial Disclaimer: Costs vary significantly by location, site conditions, and material choices. These are estimates for planning purposes only.
Refund Policy Reference: Due to the digital nature of our plans, all sales are final. Please review our Refund Policy for details.