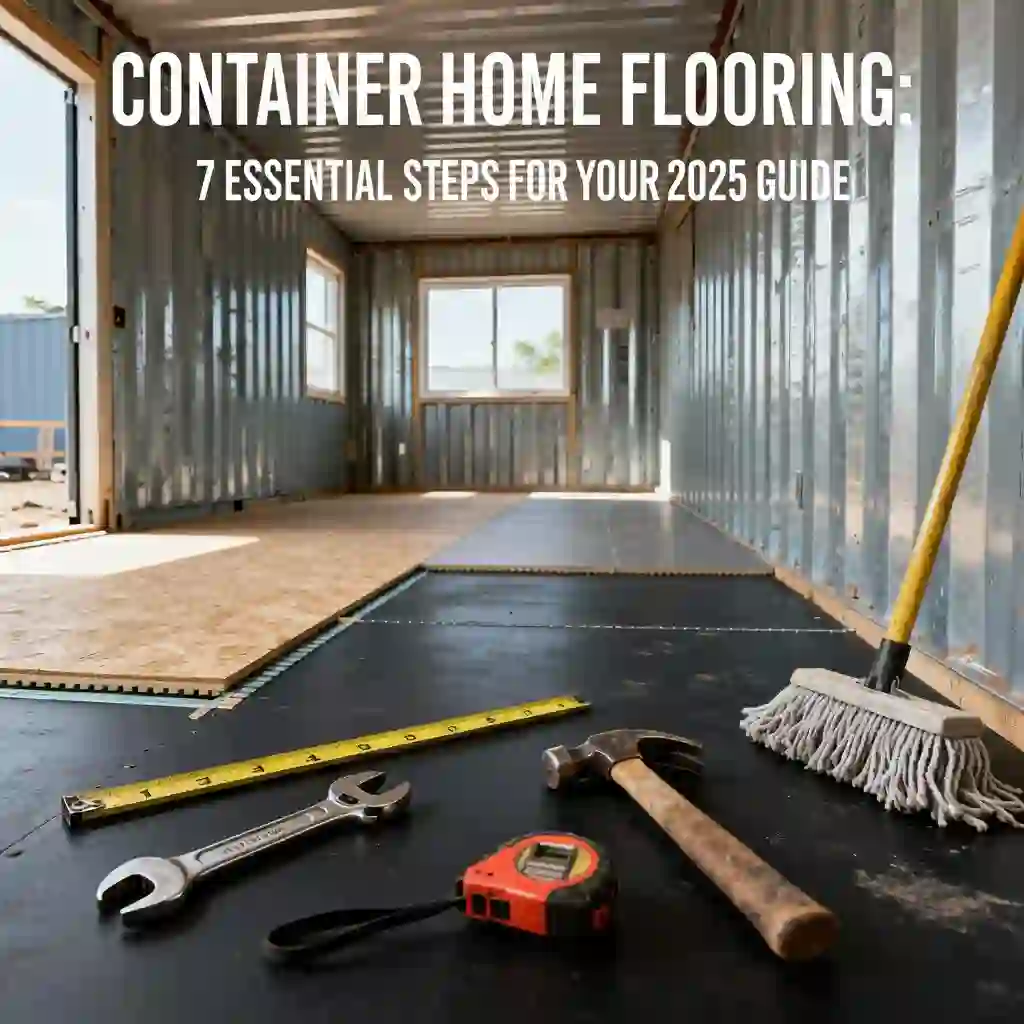
The Ultimate Guide to Container Home Flooring: 7 Essential Steps from Subfloor to Finish
A complete 4,500+ word professional guide on how to safely remove, frame, insulate, and install code-compliant container home flooring, from the original marine plywood to your final finish.
Your Home’s Foundation Starts with the Floor
Welcome to your complete guide for one of the most critical parts of your build: your container home floor. It’s more than just what you walk on; it’s the foundation of your home’s comfort, energy efficiency, and long-term health. Many new builders are drawn to the seemingly “ready-made” floor in a shipping container, but this is the single most important component to address correctly from day one.
The original marine-grade plywood floor was designed for industrial shipping, not residential living. It often contains harmful pesticides and is a major source of thermal bridging, leading to cold floors and condensation. This guide is our professional recommendation, walking you through the entire process of safely removing the old floor, treating the steel, and building a new, warm, and code-compliant container home flooring system from the ground up. We’ll cover everything from framing and insulation to choosing your final finishes, all while referencing the International Residential Code (IRC) and International Building Code (IBC).
The First Decision: Assessing the Original Container Floor
Before you build a single wall, your first major decision lies right under your feet. The floor of a “one-trip” container might look clean and sturdy, but it was never designed for a family to live on. Understanding what it’s made of and the risks involved is a non-negotiable step in your build.
What is the Original Floor Made Of?
Shipping container floors are built for extreme durability. They are typically 1.1-inch (28mm) thick and made of multiple layers of marine-grade plywood, often from tropical hardwoods like Keruing or Apitong, or sometimes bamboo. These layers are laminated together with a strong, water-resistant adhesive. This construction allows them to withstand the immense weight of cargo and the harsh conditions of ocean travel.
The underside of the container is not the floor; it’s the structural support. The plywood floor rests on a series of horizontal steel C-channel cross-members, which are spaced about 1-2 feet apart and welded to the main frame of the container.
The Health Risk: Pesticides in Container Flooring
To comply with international shipping standards (ISO standards) and prevent the transfer of invasive species, these plywood floors are almost always treated with pesticides. The most common treatments include chemicals to protect against insects (insecticides) and fungus (fungicides).
- Insecticides: Historically, chemicals like Aldrin and Dieldrin were used. In modern containers, you are more likely to find floors treated with pesticides such as Basf, Cypermethrin, or Chlorpyrifos.
- Fungicides: These are used to prevent mold and decay during long, humid ocean voyages.
These chemicals are infused into the wood and can release Volatile Organic Compounds (VOCs) into the air over the life of the container. For industrial use, this is not a concern. For a residential home, it’s a significant health risk, especially for children and pets. Furthermore, the floors may have absorbed spills from previous cargo, which could include anything from harmless materials to industrial chemicals.
For a detailed look at the chemicals involved, we recommend consulting resources from health organizations or the Environmental Protection Agency (EPA). The potential for off-gassing and chemical exposure is the primary reason we advocate for a full floor replacement.
How to Identify Your Floor’s Treatment
You can sometimes identify the floor’s treatment by looking at the container’s CSC (Convention for Safe Containers) plate, usually found on one of the cargo doors. This plate lists the container’s manufacturing details. You might see a line item for “Timber Component Treatment” which may list the chemical used (e.g., “BASF” or “ECO-BLOCK”).
However, many plates are worn, or the information is cryptic. The safest assumption is to treat *every* container floor as if it has been treated with harmful pesticides.
Removal vs. Encapsulation: A Professional Recommendation
This is a common debate, but for us, the answer is clear. You have two options:
- Encapsulation (Sealing): This involves painting the original floor with a heavy-duty, zero-VOC sealant or epoxy to “lock in” the chemicals. While this is faster and cheaper, it is not foolproof. A scratch in the sealant, a drilled hole for plumbing, or the natural degradation of the sealant over time can release VOCs. It also does nothing to solve the floor’s number one problem: thermal bridging (which we’ll cover in Section 3).
- Full Removal and Replacement: This is the *only* method we recommend for a permit-ready, safe, and comfortable home. It involves completely removing the plywood floor, treating the steel frame, and building a new insulated floor assembly.
| Metric | Full Removal & Replacement | Encapsulation (Sealing) |
|---|---|---|
| Peace of Mind & Health | ✓ High (100% removal of pesticides) | Low (Relies on sealant integrity) |
| Energy Efficiency | ✓ High (Allows for proper sub-floor insulation) | Very Low (Does not solve thermal bridging) |
| Code Compliance | ✓ High (New assembly built to code) | Low (May be rejected by inspectors) |
| Upfront Cost | High | Low |
| Labor / Time | High | Low |
| Long-Term Value | ✓ High | Low (May require mitigation later) |
Step-by-Step Guide: Safely Removing the Original Floor
Once you’ve made the decision to remove the floor, the next step is to do it safely. This is a labor-intensive job, but it’s completely achievable with the right tools and a focus on safety.
Safety First: Personal Protective Equipment (PPE)
You are dealing with treated wood. Do NOT skip this step. The dust is toxic.
- Respirator: A P100-rated respirator mask is essential. A simple N95 dust mask is not sufficient.
- Eye Protection: Full-seal goggles are required, especially when grinding.
- Gloves: Heavy-duty work gloves.
- Hearing Protection: For use with the grinder and saw.
- Coveralls: Disposable coveralls will prevent the toxic dust from settling on your clothes.
Tools for the Job
- Angle Grinder (with cutting and grinding wheels)
- Heavy-duty Drill (with bits for drilling steel)
- Reciprocating Saw (with metal-cutting blades)
- Large Pry Bar / Wrecking Bar
- Sledgehammer
- Circular Saw
- Shop-Vac (with a HEPA filter)
The Removal Process: Grinding, Cutting, and Prying
The plywood floor is secured by dozens of self-tapping steel screws that are driven through the plywood and into the steel cross-members. After years of use, these are almost always rusted solid.
- Grind the Screw Heads: Don’t even bother trying to unscrew them. The fastest method is to use your angle grinder to grind the head off every single screw. This will disconnect the board from the steel frame.
- Cut Seams: Use your circular saw (set to just over 1.1″ depth) to cut the plywood into smaller, manageable sections. A 40ft container floor is too large to remove in one piece. Cut a grid of perhaps 4’x4′ sections.
- Pry and Lift: This is the muscle. Use your large pry bar and sledgehammer to begin prying the sections up. They are often glued to the cross-members with a black, tar-like adhesive. Work one section at a time.
- Cut Stubborn Screws: If some screw shanks are still holding on, use the reciprocating saw with a metal-cutting blade to cut them off flush with the steel cross-member.
- Clean-Up: Use the Shop-Vac with a HEPA filter to thoroughly clean all dust and debris from the container. Dispose of the old plywood in accordance with your local regulations for treated lumber.
Prepping the Steel Frame: Rust Treatment and Insulation
With the floor gone, you now have full access to the container’s steel “skeleton.” This is your one and only chance to treat it and insulate it from below.
Inspecting and Treating the Steel Cross-Members
Inspect every inch of the steel cross-members and the bottom of the main container rails. You will likely find surface rust, especially where the plywood was in contact with the steel.
- Remove Scale: Use a wire wheel on your grinder or a wire brush to remove any loose, flaking rust.
- Clean: Wipe the steel down with a degreaser or solvent to remove any remaining adhesive or oils.
- Treat: Apply a high-quality rust-converting primer (which chemically converts rust to a stable, paintable surface) or a direct-to-metal (DTM) rust-inhibiting paint. This protects the structural integrity of your home’s foundation.
The “Cold Bridge” Problem: Why Under-Container Insulation is Critical
Steel is a fantastic conductor of heat. In winter, the cold air under your container will turn those steel cross-members into “cold bridges,” radiating cold directly into your living space. This makes your floor ice-cold, forces your heating system to work overtime, and—most dangerously—creates condensation. When your warm, moist indoor air hits the cold subfloor, it will condense into water, leading to mold, rot, and a very unhappy home.
The solution is to completely isolate the steel frame from the outside air. This is best done by insulating *underneath* the container. For an in-depth look at whole-home insulation, see our Complete Container Home Insulation Guide.
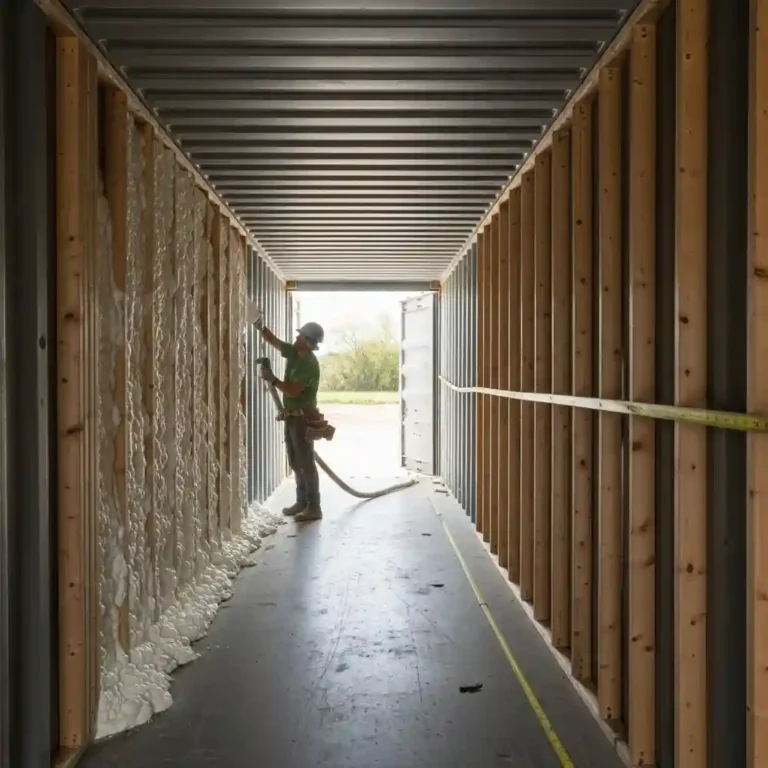
Insulation Solution 1: Closed-Cell Spray Foam (Gold Standard)
The most effective method is to have a professional apply 2-3 inches of closed-cell spray foam (CCSPF) to the entire underside of the container.
- Pros: It creates a perfect, monolithic air and vapor barrier. It adheres to all surfaces, sealing every tiny crack. It has a very high R-value (around R-6 to R-7 per inch). It also adds structural rigidity.
- Cons: It is expensive and requires professional installation. It is also not a DIY-friendly job.
Insulation Solution 2: Rigid Foam Boards (DIY-Friendly)
A more budget-friendly and DIY-friendly method is to cut and fit rigid foam boards (like XPS or Polyiso) *underneath* the C-channel cross-members.
- Method: This is typically done by welding or bolting metal studs or angle iron “ledges” to the bottom of the container’s main rails, creating a bay.
- Install: Rigid foam boards are then cut to size and friction-fit into these bays, tight against the underside of the steel cross-members.
- Seal: ALL seams between the boards and gaps against the steel must be meticulously sealed with canned spray foam or approved construction tape (like 3M All-Weather Flashing Tape). This step is critical to create an air seal.
| Insulation Type | Approx. R-Value/Inch | Pros | Cons |
|---|---|---|---|
| Closed-Cell Spray Foam | R-6.5 to R-7 | Perfect air/vapor barrier, high R-value, fast install. | Requires professional, expensive, high GWP. |
| XPS Rigid Board | R-5 | DIY-friendly, high R-value, moisture resistant. | Must meticulously air-seal joints. |
| Polyiso Rigid Board | R-6 to R-6.5 | Highest R-value, eco-friendlier. | Can lose R-value in extreme cold, must seal joints. |
| EPS Rigid Board | R-3.8 to R-4.2 | Most affordable, eco-friendlier, permeable. | Lowest R-value, must seal joints. |
Code Compliance for Insulation (IRC Chapter 11)
The building code dictates the minimum insulation you need. While codes are written for traditional homes, the principles apply. You must meet the R-value requirements for floors in your specific climate zone.
Section N1102.1 (R402) – Building Thermal Envelope: “The building thermal envelope shall be constructed to limit air leakage… and shall be insulated to the R-values of Table N1102.1.3.”
Table N1102.1.3 (R402.1.3) – Insulation and Fenestration Requirements: This table lists the minimum R-value for floors. For example, Climate Zone 5 requires an R-30 floor. To achieve this, you would need ~5 inches of closed-cell spray foam or ~6 inches of XPS rigid foam. Your local building department will confirm this requirement.
Achieving this high R-value is why insulating *under* the container is so important. It creates the space needed for thick, continuous insulation.
Framing Your New Container Home Subfloor
With the old floor gone and the underside insulated, you now have a clean (but corrugated) steel surface to build on. The original plywood floor sat directly on the steel cross-members. Your new floor will be a framed assembly, much like a traditional home, creating a cavity for plumbing, electrical, and additional insulation.
Option 1: Pressure-Treated Wood Framing (The Standard)
This is the most common, cost-effective, and builder-friendly method. You will build a wood frame *inside* the container, resting on the steel cross-members.
- Material: You MUST use pressure-treated lumber (2x4s or 2x6s) for any wood that will be in contact with the steel container frame. This is a code requirement.
- Joist Spacing: You can run your joists either lengthwise (parallel to the container walls) or widthwise (spanning the 8-foot width). Running them widthwise is often easier. Joist spacing is typically 16 inches or 24 inches on center (o.c.), which will be determined by the span-rating of your subfloor sheathing (see Section 5).
Section R317.1 – Protection of Wood and Wood-Based Products Against Decay: “Wood and wood-based products… shall be preservative-treated… in the following locations: … 3. Sills and sleepers on a concrete or masonry slab that is in direct contact with the ground… 6. Wood structural members supporting moisture-permeable floors… exposed to the weather.”
Guidance: While a container is steel, it is in direct contact with the ground (via the foundation) and subject to condensation. Building departments will almost universally require all framing in contact with the container shell to be pressure-treated, just as you would for a sill plate on a concrete foundation. We recommend this as a best practice.
💡 Pro-Tip: “Sleepers” vs. “On-Edge” Joists
You can lay your 2×4 framing “flat” (as sleepers). This saves a lot of headroom but only gives you 1.5 inches for insulation. A much better method is to install your 2x4s or 2x6s “on edge,” just like a traditional floor. This creates a 3.5-inch or 5.5-inch cavity, which you can fill with insulation (like mineral wool or fiberglass batts). This “in-frame” insulation works *with* your under-floor continuous insulation to create a super-insulated floor.
Option 2: Cold-Formed Steel Framing (Durable Alternative)
You can also frame your floor with light-gauge steel studs.
- Pros: Steel is 100% immune to termites and rot. It is perfectly straight and dimensionally stable.
- Cons: It is more expensive and requires different tools (self-tapping screws, metal-cutting saw). It is also a much worse thermal bridge than wood, so isolating it from the steel cross-members with a “gasket” or thermal tape is essential.
Section R505 – Cold-Formed Steel Floor Framing: If you choose this path, your framing must comply with the requirements of this section, which covers material thickness, fastening, and bracing, and often references standards like AISI S230.
A Critical Note on Headroom and Code
A standard container has an interior height of ~8′ 6″. A high-cube (HC) container is ~9′ 6″. The 2021 IRC has a clear requirement for minimum ceiling height.
Section R305.1 – Minimum Height: “Habitable space… shall have a ceiling height of not less than 7 feet (2134 mm).”
Your floor assembly (framing + subfloor + finished floor) and your ceiling assembly (framing + drywall) will eat into this height. For example:
Standard Container (8′ 6″ or 102″)
– 5.5″ (2×6 joists on edge)
– 0.75″ (Subfloor)
– 0.5″ (Finished LVP floor)
– 1.5″ (Ceiling furring strips)
– 0.5″ (Ceiling drywall)
Total Height Lost: 8.75 inches
Remaining Ceiling Height: 93.25″ (7′ 9.25″) – This is code-compliant and comfortable.
This is why we strongly recommend using High-Cube (HC) containers for all residential builds. Starting with a standard-height container makes it very difficult to build a properly insulated floor and ceiling while meeting the 7-foot minimum height requirement.
Attaching Your Framing to the Steel Container
You must securely attach your new floor frame to the container’s steel cross-members.
- Adhesive: Apply a generous bead of high-quality construction adhesive (like Loctite PL Premium 3x) to the top of every steel cross-member before laying your joists.
- Fasteners: Secure the joists to the steel cross-members using self-tapping screws designed for steel. This, combined with the adhesive, creates a strong, squeak-free bond.
- Perimeter Frame: Build a perimeter frame (rim joist) that sits just inside the container’s main steel rails. This provides the nailing edge for your subfloor.
Step 5: Installing the Subfloor Sheathing
Once your frame is built, level, and secure, it’s time to install the sheathing. This is the structural “skin” that will serve as the base for your finished floors.
Choosing Your Sheathing: Plywood vs. OSB
Your two primary choices for subfloor sheathing are Plywood and Oriented Strand Board (OSB). We recommend a “single-layer” floor, meaning the subfloor is thick enough to be structural on its own.
- Plywood (CDX Grade): The traditional choice. It’s strong, stiff, and holds fasteners well. It is also more water-resistant than standard OSB if it gets wet during construction.
- High-Performance OSB (e.g., Advantech): These are modern, engineered panels that are extremely stiff and designed with moisture-resistant resins. They are often tongue-and-groove, which makes for a very strong, flat floor.
For either material, we recommend a minimum thickness of 3/4 inch (23/32″). This thickness provides a rock-solid feel and can easily span joists up to 24 inches o.c.
Code-Compliant Subfloor Installation
Installing your subfloor correctly is critical for strength and to prevent squeaks. The IRC provides clear guidance on this.
Table R503.2.1.1(1) – Allowable Spans for Wood Structural Panels: This table dictates the minimum thickness of your sheathing based on your joist spacing. For a subfloor with a 24-inch joist spacing, a “Span Rating” of 48/24 is required. This corresponds to a minimum thickness of 23/32″ (or 3/4″). This confirms our 3/4″ recommendation.
Follow these steps for a professional installation:
- Apply Adhesive: Run a continuous bead of subfloor construction adhesive on top of every joist. This is the #1 way to prevent future floor squeaks.
- Lay Panels Perpendicular: Lay your 4×8 sheathing panels perpendicular to the floor joists.
- Stagger Joints: The end-seams of your panels must land on a joist. Stagger these seams so that you never have two seams on the same joist, side-by-side. This distributes the load and makes the floor much stronger.
- Leave an Expansion Gap: Leave a 1/8-inch gap between all panel edges (both the 4-foot and 8-foot sides). This allows the wood to expand and contract with humidity changes and prevents buckling.
- Fasten Securely: Use 2-inch subfloor screws (not nails, as screws have better holding power). Follow the code-required fastening schedule: typically every 6 inches on center along the panel edges and every 12 inches on center in the “field” (the intermediate joists).
Pro-Tip: Preventing Squeaks and Gaps
A container home can flex slightly during transport or settling. To build a floor that remains silent and stable, take these extra steps:
- Use a “Gasket”: Before installing your wood or steel framing (Section 4), roll out a thin (1/8″) foam sill seal (used for foundation sill plates) on top of the steel cross-members. This creates a “gasket” that decouples the subfloor frame from the steel, preventing squeaks caused by micro-movements.
- Glue and Screw: Do not just nail your subfloor. Use a generous amount of subfloor adhesive AND screws. This creates a monolithic, bonded, and silent floor system.
The “Floor Sandwich”: Vapor Barriers & Radiant Heat
Your structural subfloor is in, but you’re not quite ready for that finished flooring. Now you need to address any final moisture control and comfort layers.
Understanding Vapor Barriers in Your Floor Assembly
A “vapor retarder” (often called a vapor barrier) is a material used to slow the movement of water vapor. Where it goes depends entirely on your insulation method.
- If You Used Closed-Cell Spray Foam Underneath: You are done. CCSPF is a Class II vapor retarder and an air barrier. You do *not* need to add another vapor barrier on top of your subfloor. Doing so could trap moisture.
- If You Used Rigid Foam Boards Underneath: If you meticulously taped and sealed all seams, your rigid foam (XPS or Polyiso) is also acting as your vapor retarder. You are likely done.
- If You Insulated *Between* Your Joists (In-Frame): This is where it gets tricky. You now have cold steel cross-members *below* your insulation. You must have a vapor *barrier* (Class I) on the *warm-in-winter* side (i.e., on top of your subfloor, under your finished floor) to prevent warm, moist indoor air from getting into the floor cavity and condensing on the cold steel.
Section R408.3 – Unvented Crawl Space: While a container floor isn’t a traditional crawl space, the physics are identical. This section requires a “continuous Class I vapor retarder” to be placed on the exposed earth. In our case, the “earth” is the cold exterior. By spray-foaming or adding sealed rigid foam *under* the container, you are creating an unvented, conditioned floor assembly that properly controls moisture and vapor from the exterior.
Adding Comfort: Installing Radiant Floor Heating
Now, with your subfloor complete, is the *perfect* time to install radiant heating. This is a very popular feature in container homes as it provides an incredibly comfortable, even heat and eliminates any remaining “cold floor” feeling.
- Electric Systems: These are thin mats or cables that are rolled out on top of the subfloor. They are easy to install and affordable. They are great for smaller spaces and supplemental heat.
- Hydronic Systems: These use PEX tubing to circulate hot water (or glycol) through the floor. They are often embedded in a thin layer of gypsum concrete or self-leveling underlayment. This method provides a more even, primary heat source but is more complex and expensive to install.
Both systems are installed *on top* of the structural subfloor and *under* the final finished flooring.
Adding Underlayment
Most “floating” floors (like LVP and laminate) require a thin foam or cork underlayment. This is *not* for insulation. Its purpose is to provide a “decoupling” layer, absorb minor imperfections in the subfloor, and deaden sound. Many finished flooring products now come with this underlayment pre-attached.
Choosing Your Final Finished Container Home Flooring
This is the fun part where you choose the look and feel of your container home flooring. Because a container home can experience slight flexing and temperature swings, some materials are far better suited than others.
Top 5 Recommended Flooring Types
- Luxury Vinyl Plank (LVP) / Luxury Vinyl Tile (LVT): This is our #1 recommendation. It’s 100% waterproof, highly durable, thin (saving headroom), and “floats” (not rigidly attached), which allows it to handle any slight flexing of the container.
- Engineered Hardwood: This gives you the look and feel of real wood, but its layered construction makes it much more stable than solid hardwood. It’s an excellent high-end choice.
- Laminate: A very popular and affordable choice. Modern laminates are extremely scratch-resistant. Be sure to choose a brand with a high-quality, water-resistant core and use a good vapor-blocking underlayment.
- Porcelain Tile: Tile is waterproof, durable, and beautiful. However, it is very cold (unless you use radiant heat) and rigid. You *must* use a high-quality, crack-isolation (decoupling) membrane (like Schluter-DITRA) between the subfloor and the tile. This membrane absorbs micro-movements, preventing your grout and tile from cracking.
- Cork: A fantastic “green” option. It’s a natural insulator, warm underfoot, soft, and naturally antimicrobial. It must be sealed properly to protect against water.
Flooring to Use with Caution
- Solid Hardwood: We do not recommend solid hardwood. It expands and contracts significantly with humidity changes. In a small, airtight space like a container, humidity swings can be more pronounced, leading to cupping, gapping, and buckling.
- Carpet: We generally advise against wall-to-wall carpet. It traps moisture, dust, and VOCs, which can be a problem in an airtight envelope. If you want a soft surface, opt for area rugs that can be removed and cleaned.
Comparison Table: Best Flooring for Container Homes
| Floor Type | Durability | Waterproof? | Cost | DIY-Friendly | Feel |
|---|---|---|---|---|---|
| Luxury Vinyl Plank (LVP) | High | ✓ Yes | $ – $$ | Excellent | Warm / Soft |
| Engineered Hardwood | Medium-High | No (Resistant) | $$ – $$$$ | Good | Warm / Hard |
| Laminate | High | No (Resistant) | $ – $$ | Excellent | Warm / Hard |
| Porcelain Tile | Excellent | ✓ Yes | $$ – $$$ | Moderate | Cold / Hard |
| Cork | Medium | No (Resistant) | $$ – $$$ | Good | Warm / Soft |
| Solid Hardwood | High | No | $$ – $$$$ | Moderate-Hard | Warm / Hard |
Budgeting for Your Container Home Floor
The cost of replacing your container floor is one of the most important expenses to budget for. It is not a place to cut corners. Below is a sample budget to help you plan. Note that these are estimates for materials only (as of 2025) and do not include professional labor, which can vary widely.
We’ll base this on a 40-foot container, which has 320 square feet of floor space. For a 20-foot container, simply halve these estimates.
Sample Flooring Budget (40ft Container – 320 sq. ft.)
| Component | Estimated Cost (per sq. ft.) | Estimated Total (320 sq. ft.) | Notes |
|---|---|---|---|
| Floor Removal & Disposal | $0.50 – $1.00 | $160 – $320 | Cost of grinder wheels, saw blades, and disposal fees. |
| Rust Treatment | $0.75 – $1.25 | $240 – $400 | Rust converter and DTM paint. |
| Under-Container Insulation (Option A) | $4.00 – $7.00 | $1,280 – $2,240 | Professionally installed 2″ closed-cell spray foam. |
| Under-Container Insulation (Option B) | $2.00 – $3.50 | $640 – $1,120 | DIY 3″ rigid foam boards (XPS/Polyiso), plus tape/sealant. |
| Floor Framing | $1.50 – $2.50 | $480 – $800 | Pressure-treated 2×4 lumber at 16″ o.c. |
| In-Frame Insulation | $1.00 – $2.00 | $320 – $640 | R-15 mineral wool or fiberglass batts (for 2×4 frame). |
| Subfloor Sheathing | $1.50 – $2.50 | $480 – $800 | 3/4″ Tongue & Groove OSB/Plywood. |
| Fasteners & Adhesives | $0.50 – $0.75 | $160 – $240 | Self-tapping screws, subfloor screws, adhesive. |
| Finished Flooring (Mid-Range) | $3.00 – $6.00 | $960 – $1,920 | Mid-range LVP or Laminate. |
| Total (w/ Spray Foam) | $12.75 – $21.00 | $4,080 – $6,720 | Recommended “Best” Method |
| Total (w/ Rigid Foam) | $10.75 – $17.50 | $3,440 – $5,600 | Recommended “DIY” Method |
Financial Disclaimer: Costs vary significantly by location, site conditions, and material choices. These are estimates for planning purposes only.
❓ Frequently Asked Questions (FAQs) About Container Home Flooring
1. Can I just paint or epoxy the original plywood floor?
We strongly advise against this. While it seems cheaper and faster to “encapsulate” or seal the floor, you are not solving the two biggest problems: 1) The seal is not permanent and can be broken, releasing pesticides and VOCs. 2) You are doing nothing to solve the massive thermal bridging problem, which will result in an ice-cold, condensation-prone floor in the winter. Full removal and replacement is the only professional, long-term solution.
2. What is the best insulation for a container home floor?
The “gold standard” is closed-cell spray foam applied to the *underside* of the container. This creates a perfect air, moisture, and vapor barrier and has a high R-value. A very good DIY-friendly alternative is to install 2-3 inches of rigid foam board (like XPS or Polyiso) under the container, with all seams meticulously taped and sealed.
3. How do I stop my container home floor from feeling so cold?
A cold floor is a sign of a “thermal bridge.” The steel cross-members are transferring the cold from the outside ground/air directly to your floor. The only way to stop this is with “continuous insulation” applied to the *underside* of the container (as described in Section 3), which creates a “thermal break” between the steel and the outside air.
4. How much ceiling height will I lose when I build a new floor?
This depends on your framing. If you use 2×4 joists “on edge” (3.5″ high) and 3/4″ subfloor, you will lose 4.25 inches *before* your finished flooring. This is why we strongly recommend using a High-Cube (9’6″) container, as it gives you plenty of room. In a standard 8’6″ container, you will be very close to the 7-foot minimum ceiling height required by IRC Section R305.1.
5. Do I have to weld the new floor frame?
No. Welding is not required. You can build your new subfloor frame from either pressure-treated wood or light-gauge steel studs. This frame can be secured to the container’s steel cross-members using a combination of strong construction adhesive (like PL Premium) and specialized self-tapping screws designed for steel.
6. What is the R-value I need for my floor?
This is dictated by your climate zone in the IRC, Table N1102.1.3. For example, Climate Zone 3 requires an R-13 floor, Zone 5 requires an R-30, and Zone 7 requires an R-38. You must consult your local building department, but a good target for most of the U.S. is R-25 to R-30, which provides excellent comfort and energy efficiency.
7. What is a “floating floor” and why is it recommended?
A floating floor (like most LVP and laminate) is one that is not nailed, glued, or mortared to the subfloor. The planks or tiles lock together and “float” as a single, unified sheet on top of an underlayment. This is ideal for container homes because it allows the floor to expand and contract independently from the structure, which may experience minor flexing. This prevents cracking, buckling, or gapping.
8. How do I run plumbing under my new floor?
This is a key benefit of a framed floor. The cavity you create (e.g., 3.5″ deep with 2x4s) is the perfect place to run plumbing pipes and electrical conduit. You will need to drill holes through your new joists to run the pipes. Be sure to follow IRC Section R502.8, which limits the size and location of holes to protect the joist’s structural integrity (holes cannot be larger than 1/3 the joist depth and must be 2″ from any edge).
9. My container’s steel cross-members are corrugated, not flat. How do I insulate?
This is normal. The steel “floor” of a container is a corrugated sheet, and the cross-members sit on top of that. When you apply spray foam from the underside, it will fill all these corrugations and cover the cross-members, creating a flat, insulated surface. If using rigid board, you will press the board flat against the *bottom* of the cross-members, leaving a small air gap in the corrugations, which is perfectly acceptable.
10. Can I use the original container floor in an off-grid cabin?
We would still advise against it. While you might not need a permit in some rural areas, the health risks from pesticides and the comfort/moisture problems from a lack of insulation remain the same. An off-grid cabin needs to be highly efficient, and a cold, uninsulated floor will drain your heating resources (whether it’s a wood stove or propane) and create a damp, uncomfortable environment.
Your Container Home Journey Starts with a Solid Floor
The floor is, without a doubt, one of the most labor-intensive parts of a container home conversion. It’s tempting to cut corners, but as we’ve shown, the original floor presents significant health, comfort, and structural challenges. By removing it, you gain total control over your home’s long-term safety and performance.
Building a new, insulated floor assembly is a one-time investment that pays dividends for the life of your home. It ensures your space is warm, dry, energy-efficient, and free of harmful chemicals. It’s the professional method, the code-compliant method, and the right way to build a home you and your family will love.
This process is foundational to your entire build. If you’re planning your project, we highly recommend exploring our other guides, starting with your container home foundation options, to ensure your home is stable, secure, and ready for permitting.
Ready to Plan Your Foundation and Floor System?
A proper floor assembly works hand-in-hand with a code-compliant foundation. Explore our detailed guides on foundation designs that are approved for container homes and learn how to start your project on solid ground.
Explore Foundation Plans Browse All Home PlansNeed a modification? If you love one of our designs but need to adjust the floor plan or foundation details, we offer a plan modification service after purchase. Just contact us for a quote!
Important: Our plans are permit-ready but require review and stamping by a local licensed Professional Engineer (PE) in your jurisdiction. Final approval is subject to local building codes and regulations.
Costs vary significantly by location, site conditions, and material choices. These are estimates for planning purposes only.
No Legal Advice: This guide is for informational purposes only and does not constitute legal or building code advice. We recommend consulting your local building department to verify all requirements.
Refund Policy Reference: Due to the digital nature of our plans, all sales are final. Please review our Refund Policy for details.